Step 1: Create a Requirement LM (RLM)
After your first login, you will see a screen like the one shown below. This is your default “Personal” project which is perfect for exploring and testing the platform’s features. Click on the New RLM button to create a Requirement LM—a dedicated notebook where you can capture notes from workshops or conversations with business users.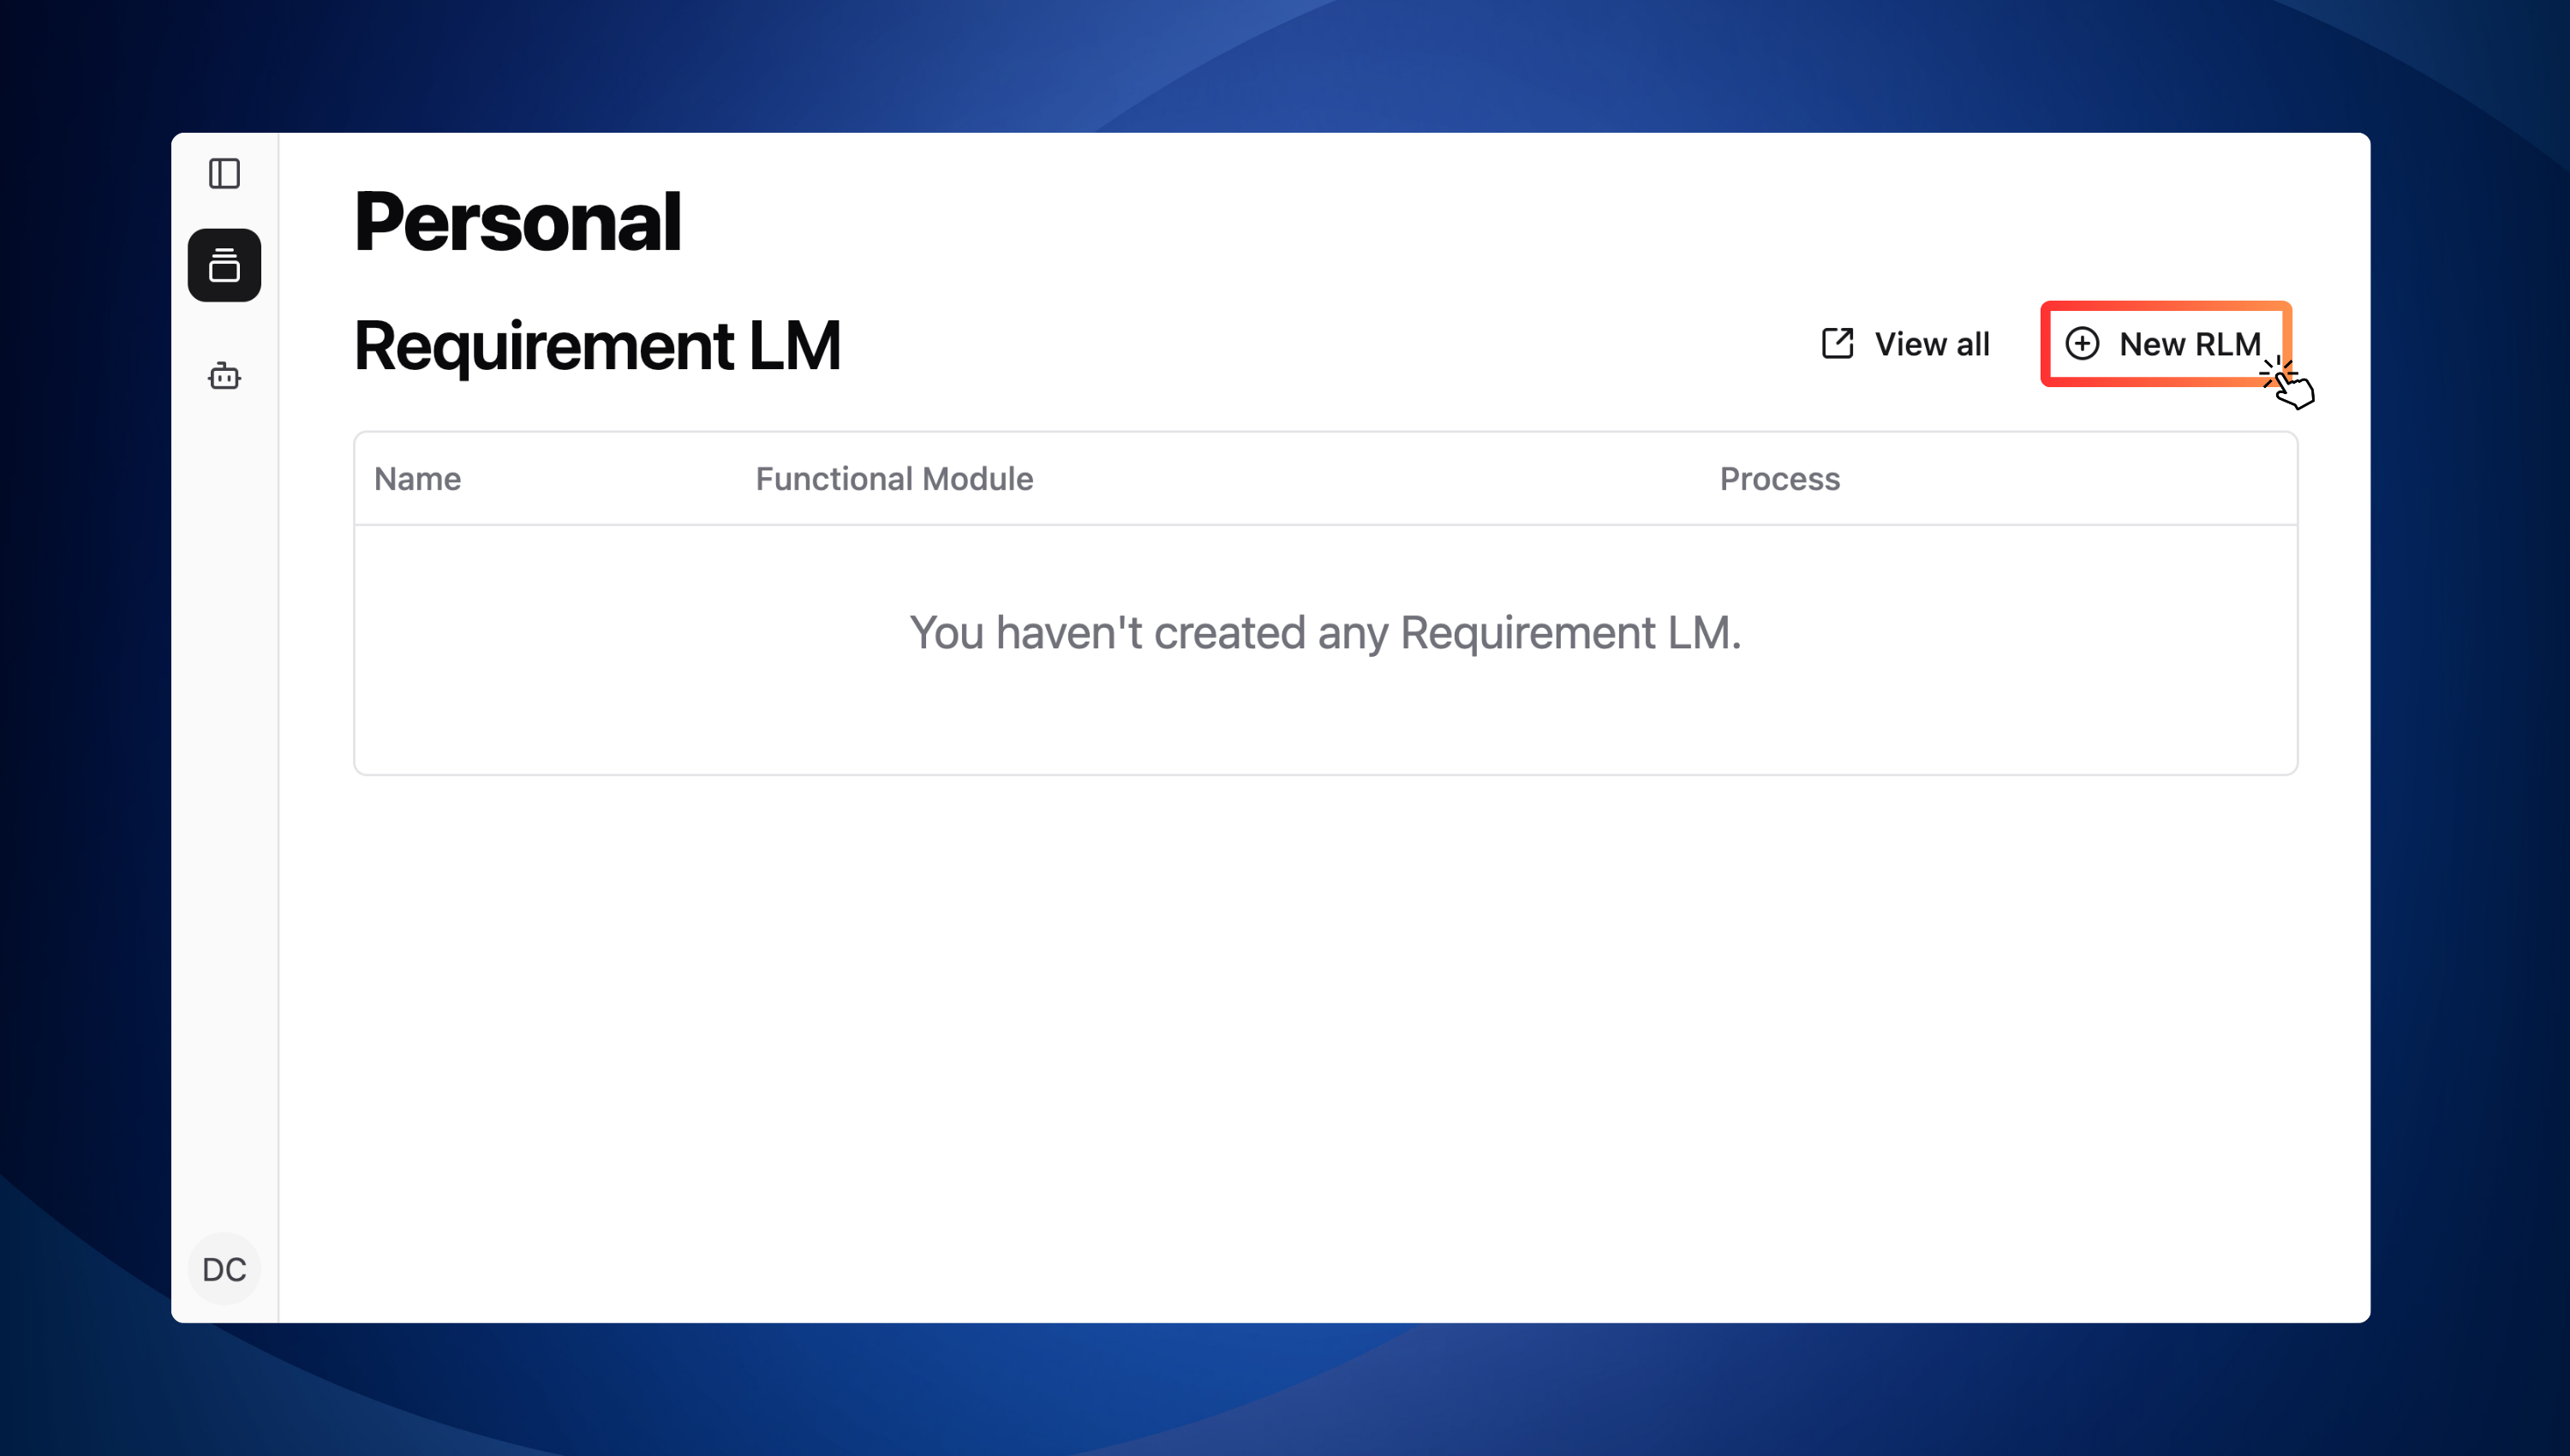
New RLM button
Step 2: Configure your Requirement LM
Next, you will see a dialog box pop up (see image below). This is where you will define your Requirement LM. You may use the sample values below for this test: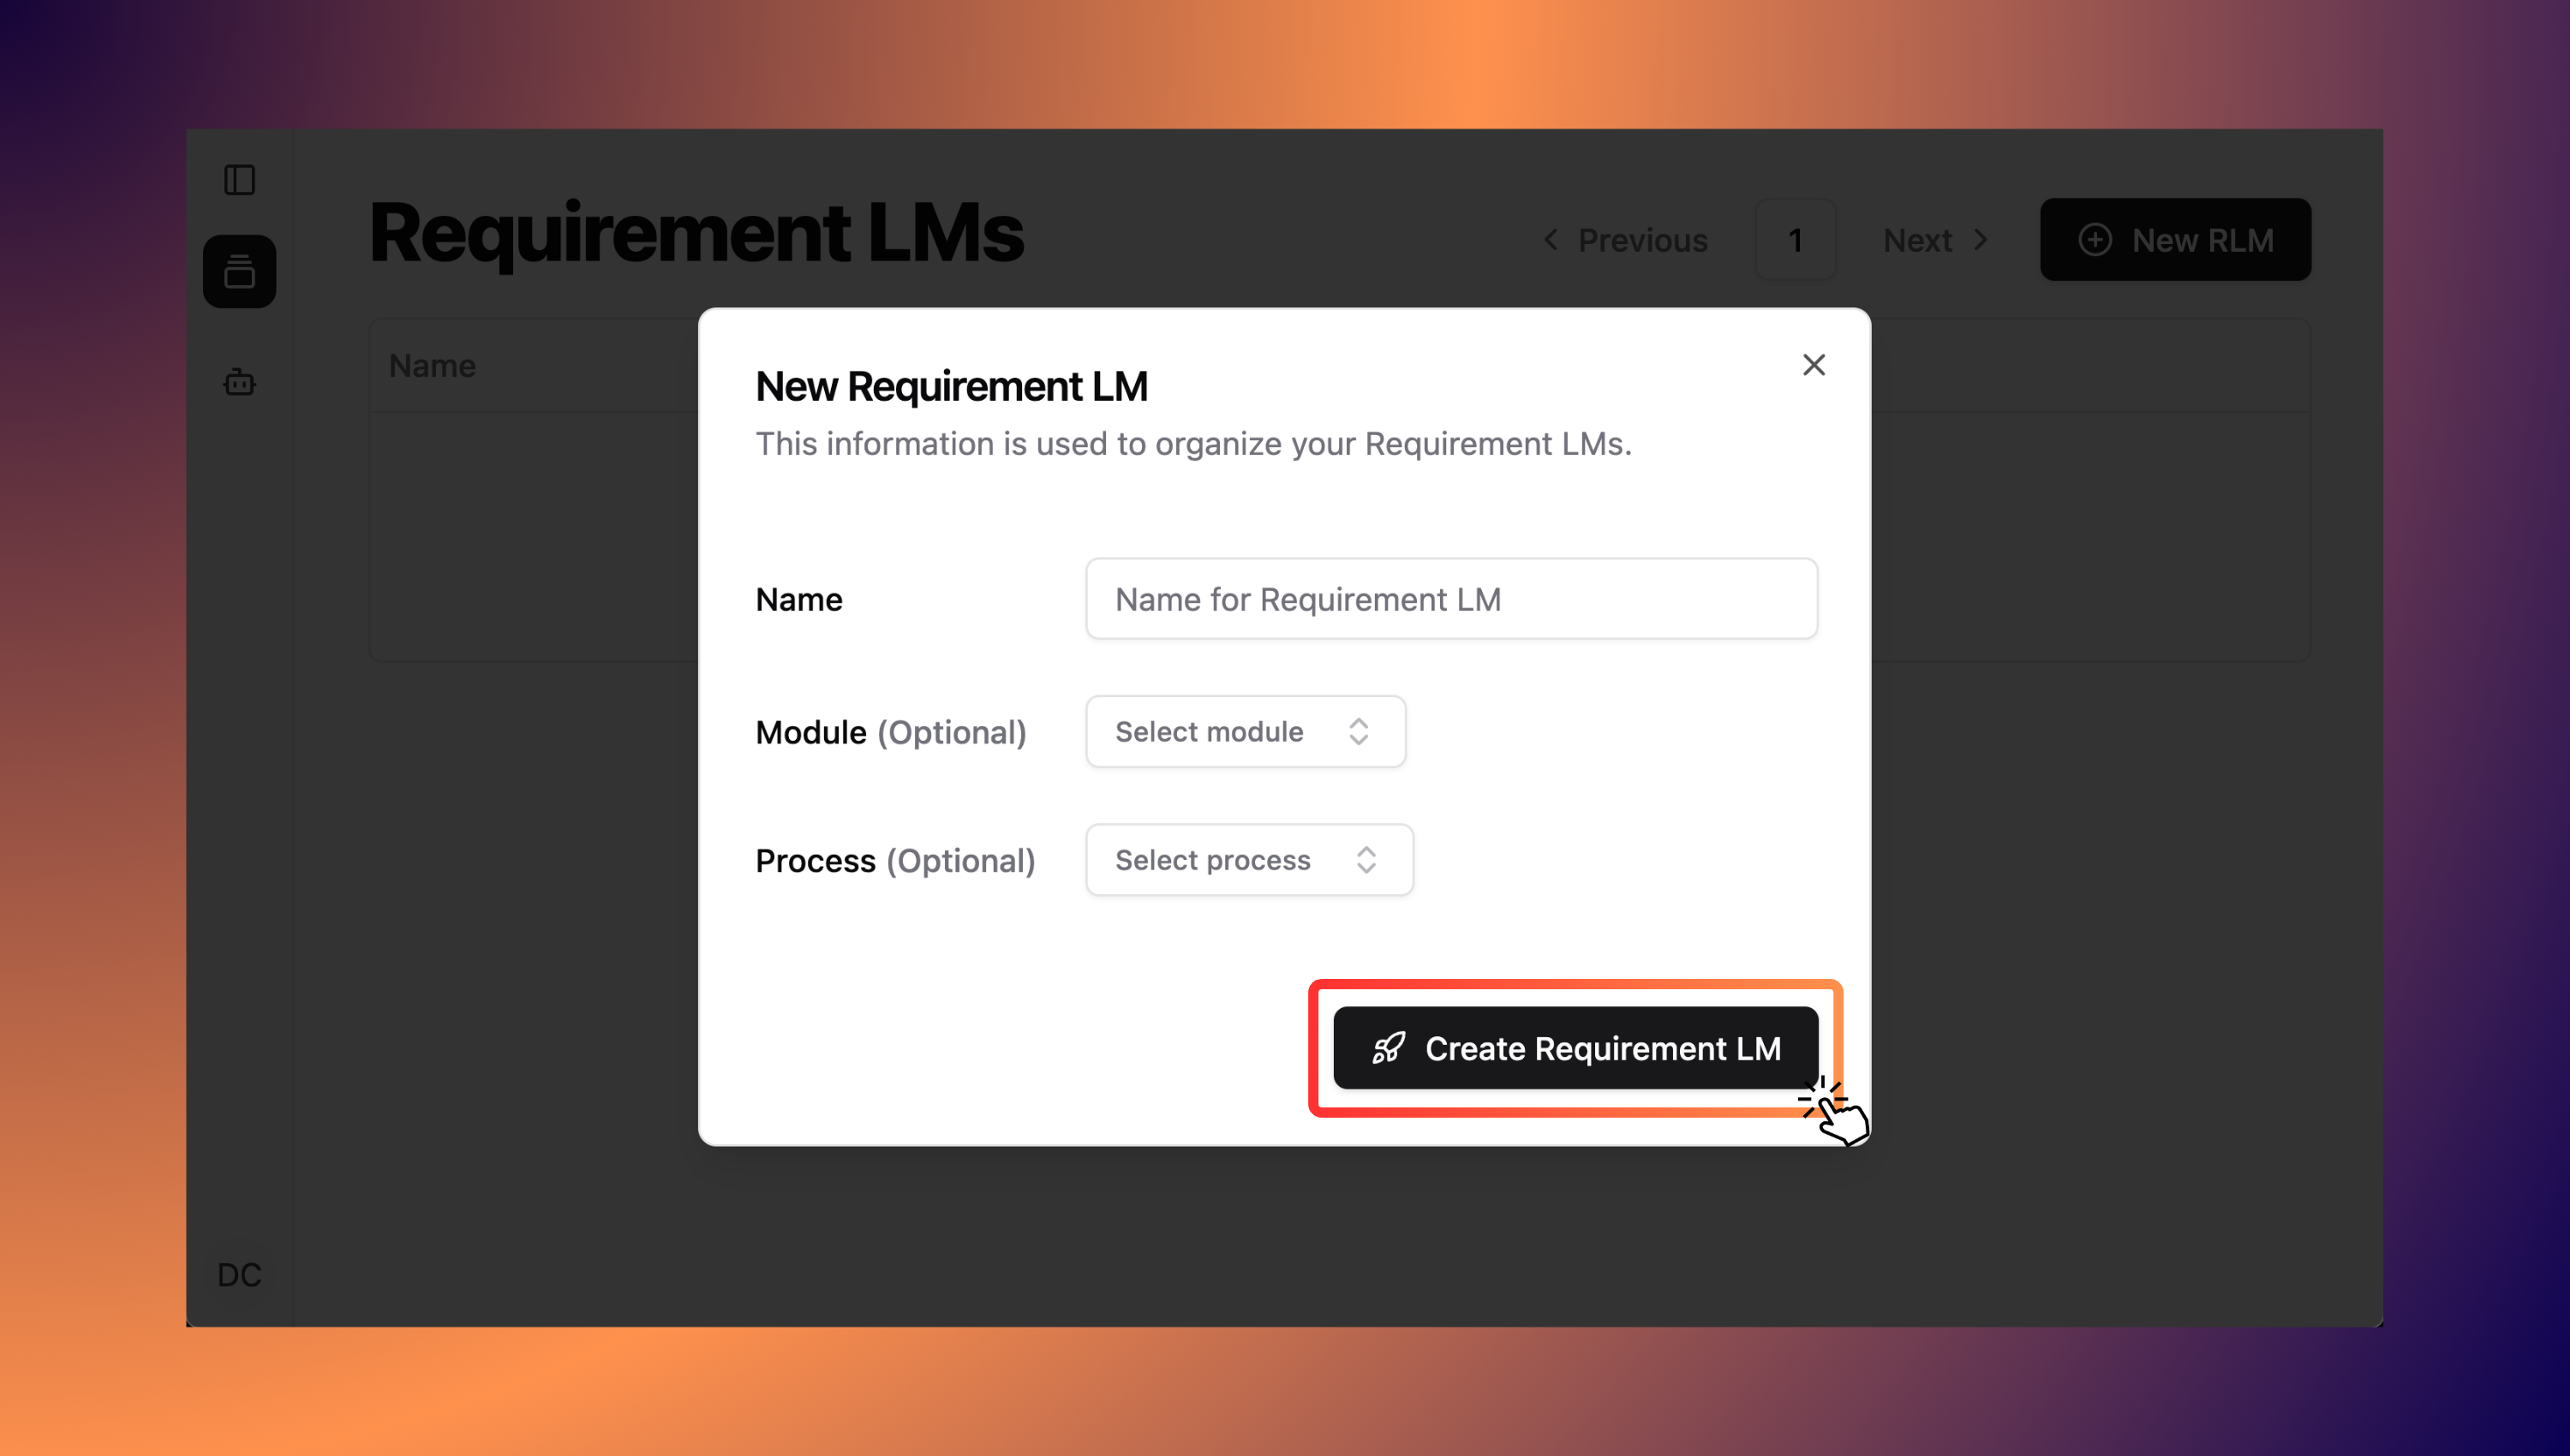
Configure your RLM
Step 3: Capture Your First Notes
Once your RLM is created, you will be directed to a notebook interface (see below). This is where you can start writing notes—just like you would during a workshop with business users. To help you get started, here’s a sample note: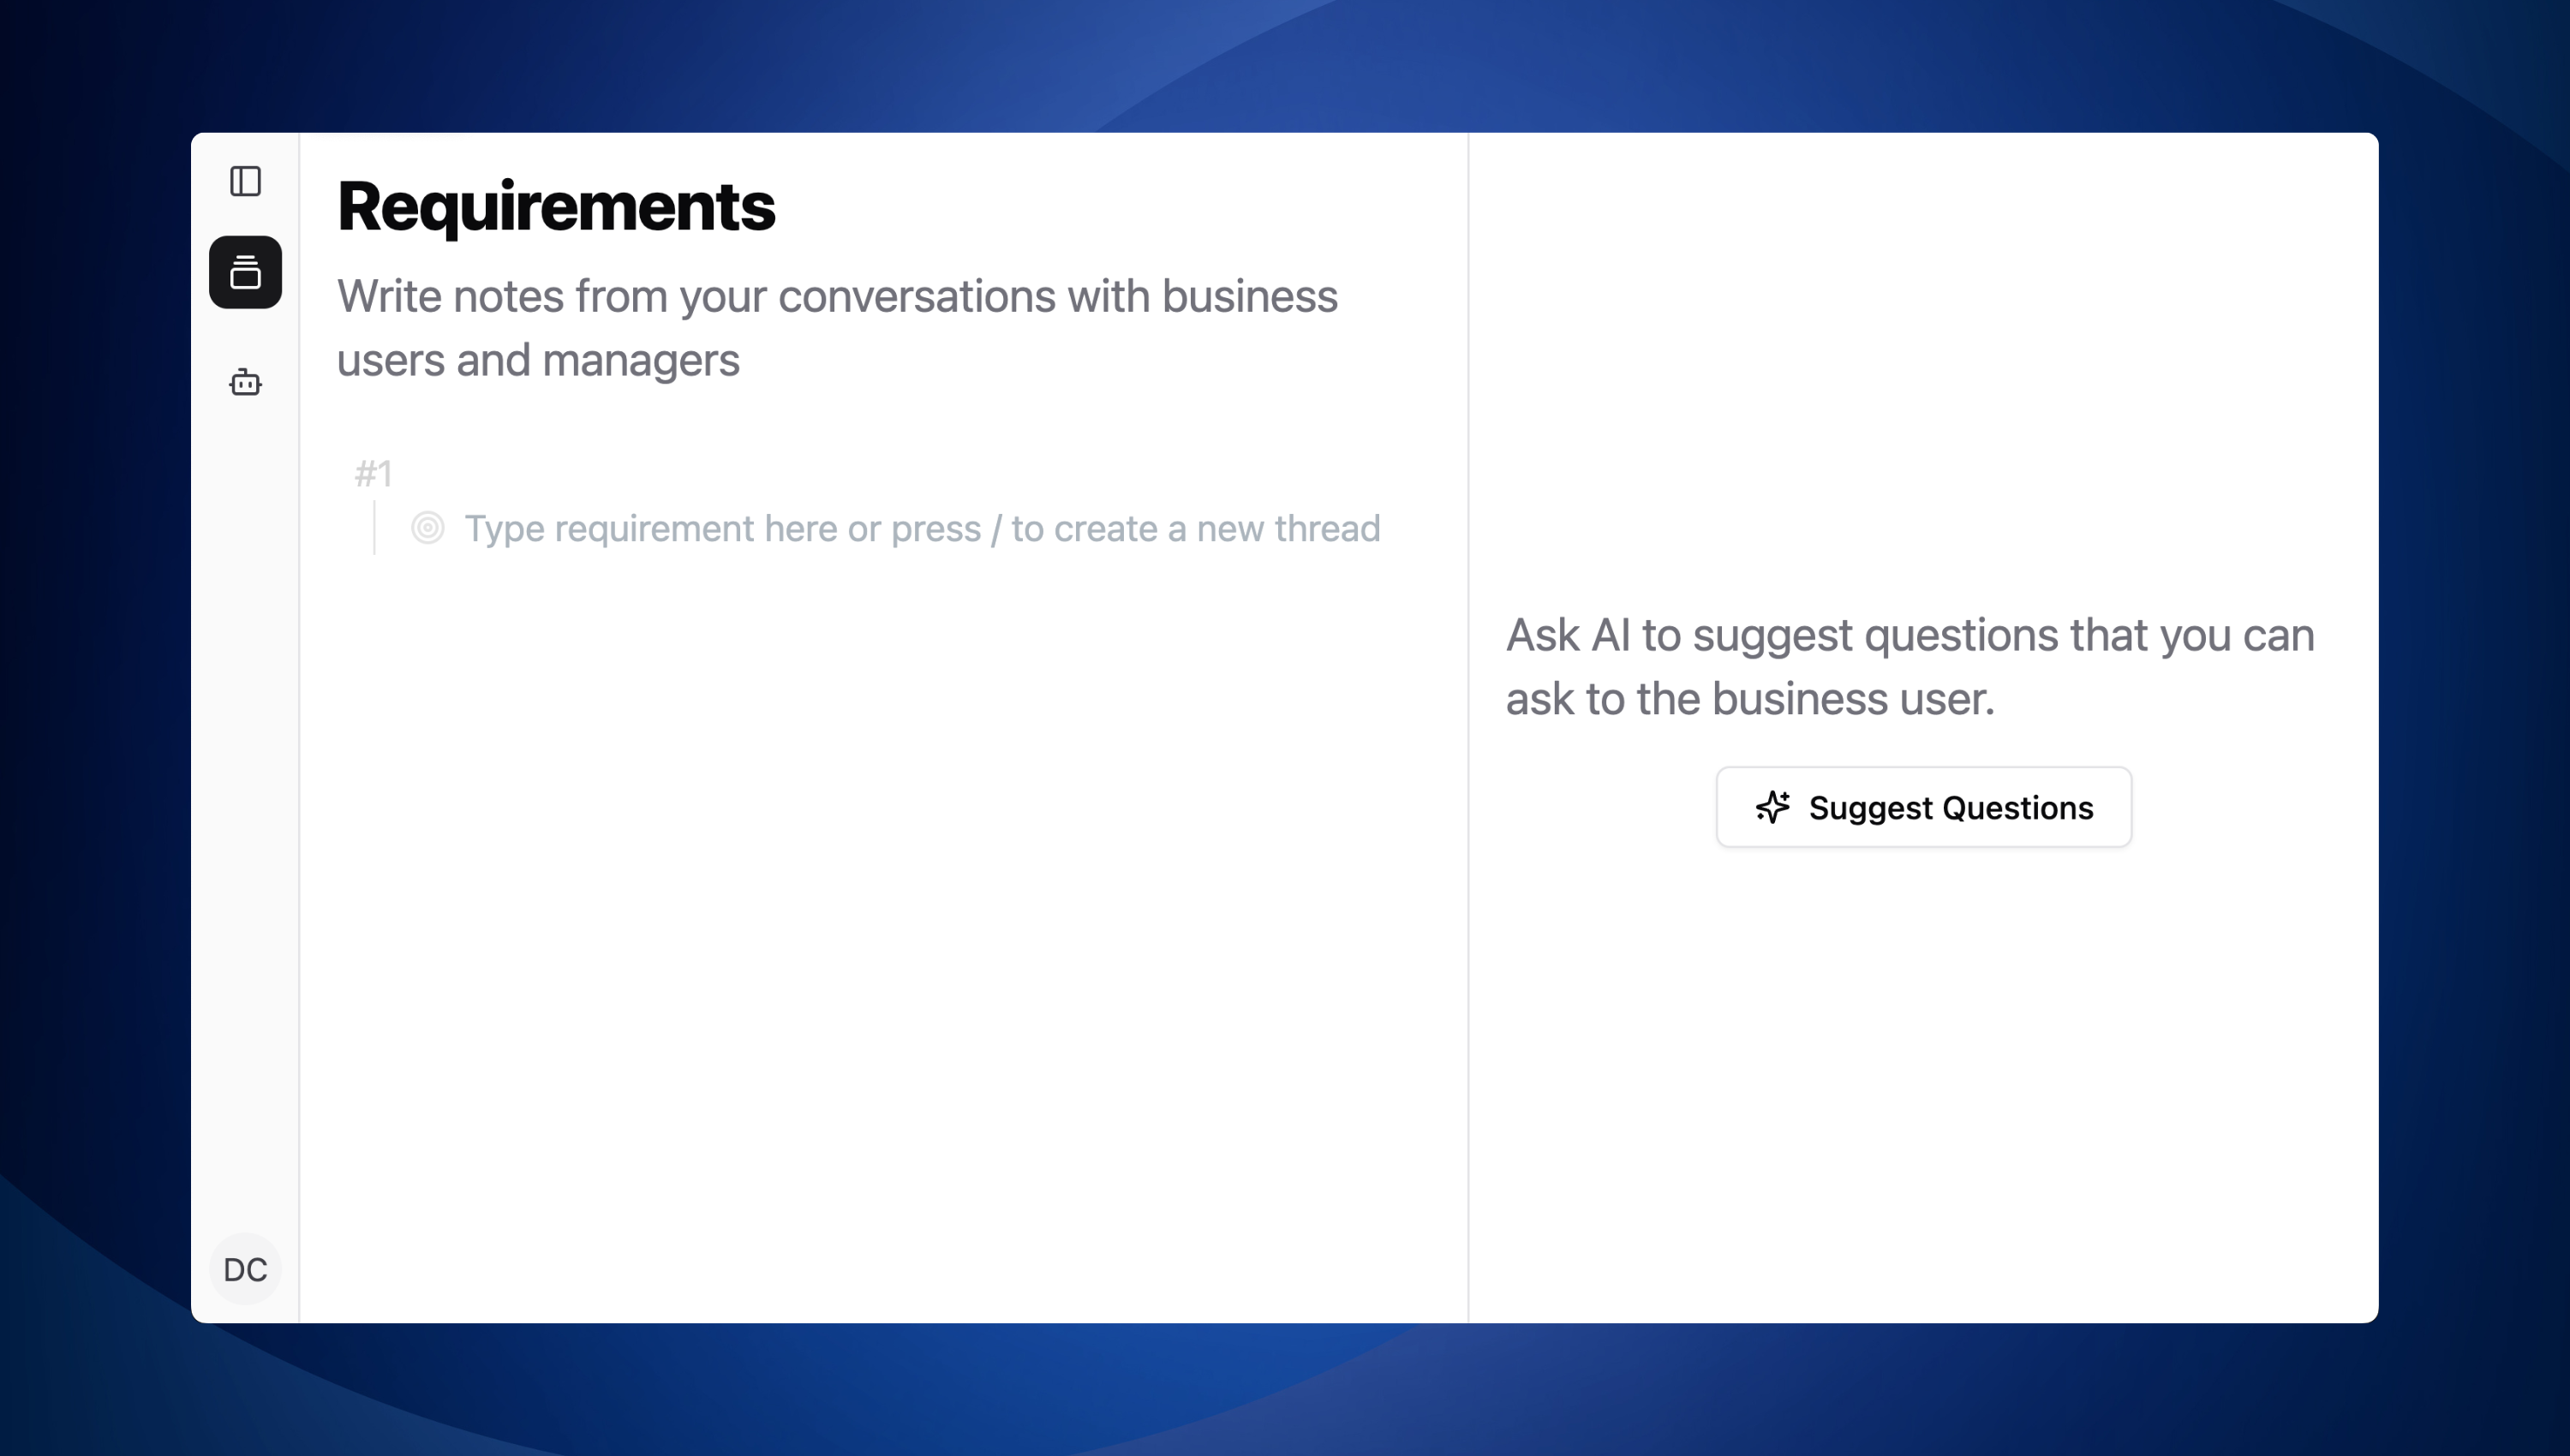
RLM Interface
Step 4: Generate initial questions
To dive deeper into business requirements, click on Suggest Questions button.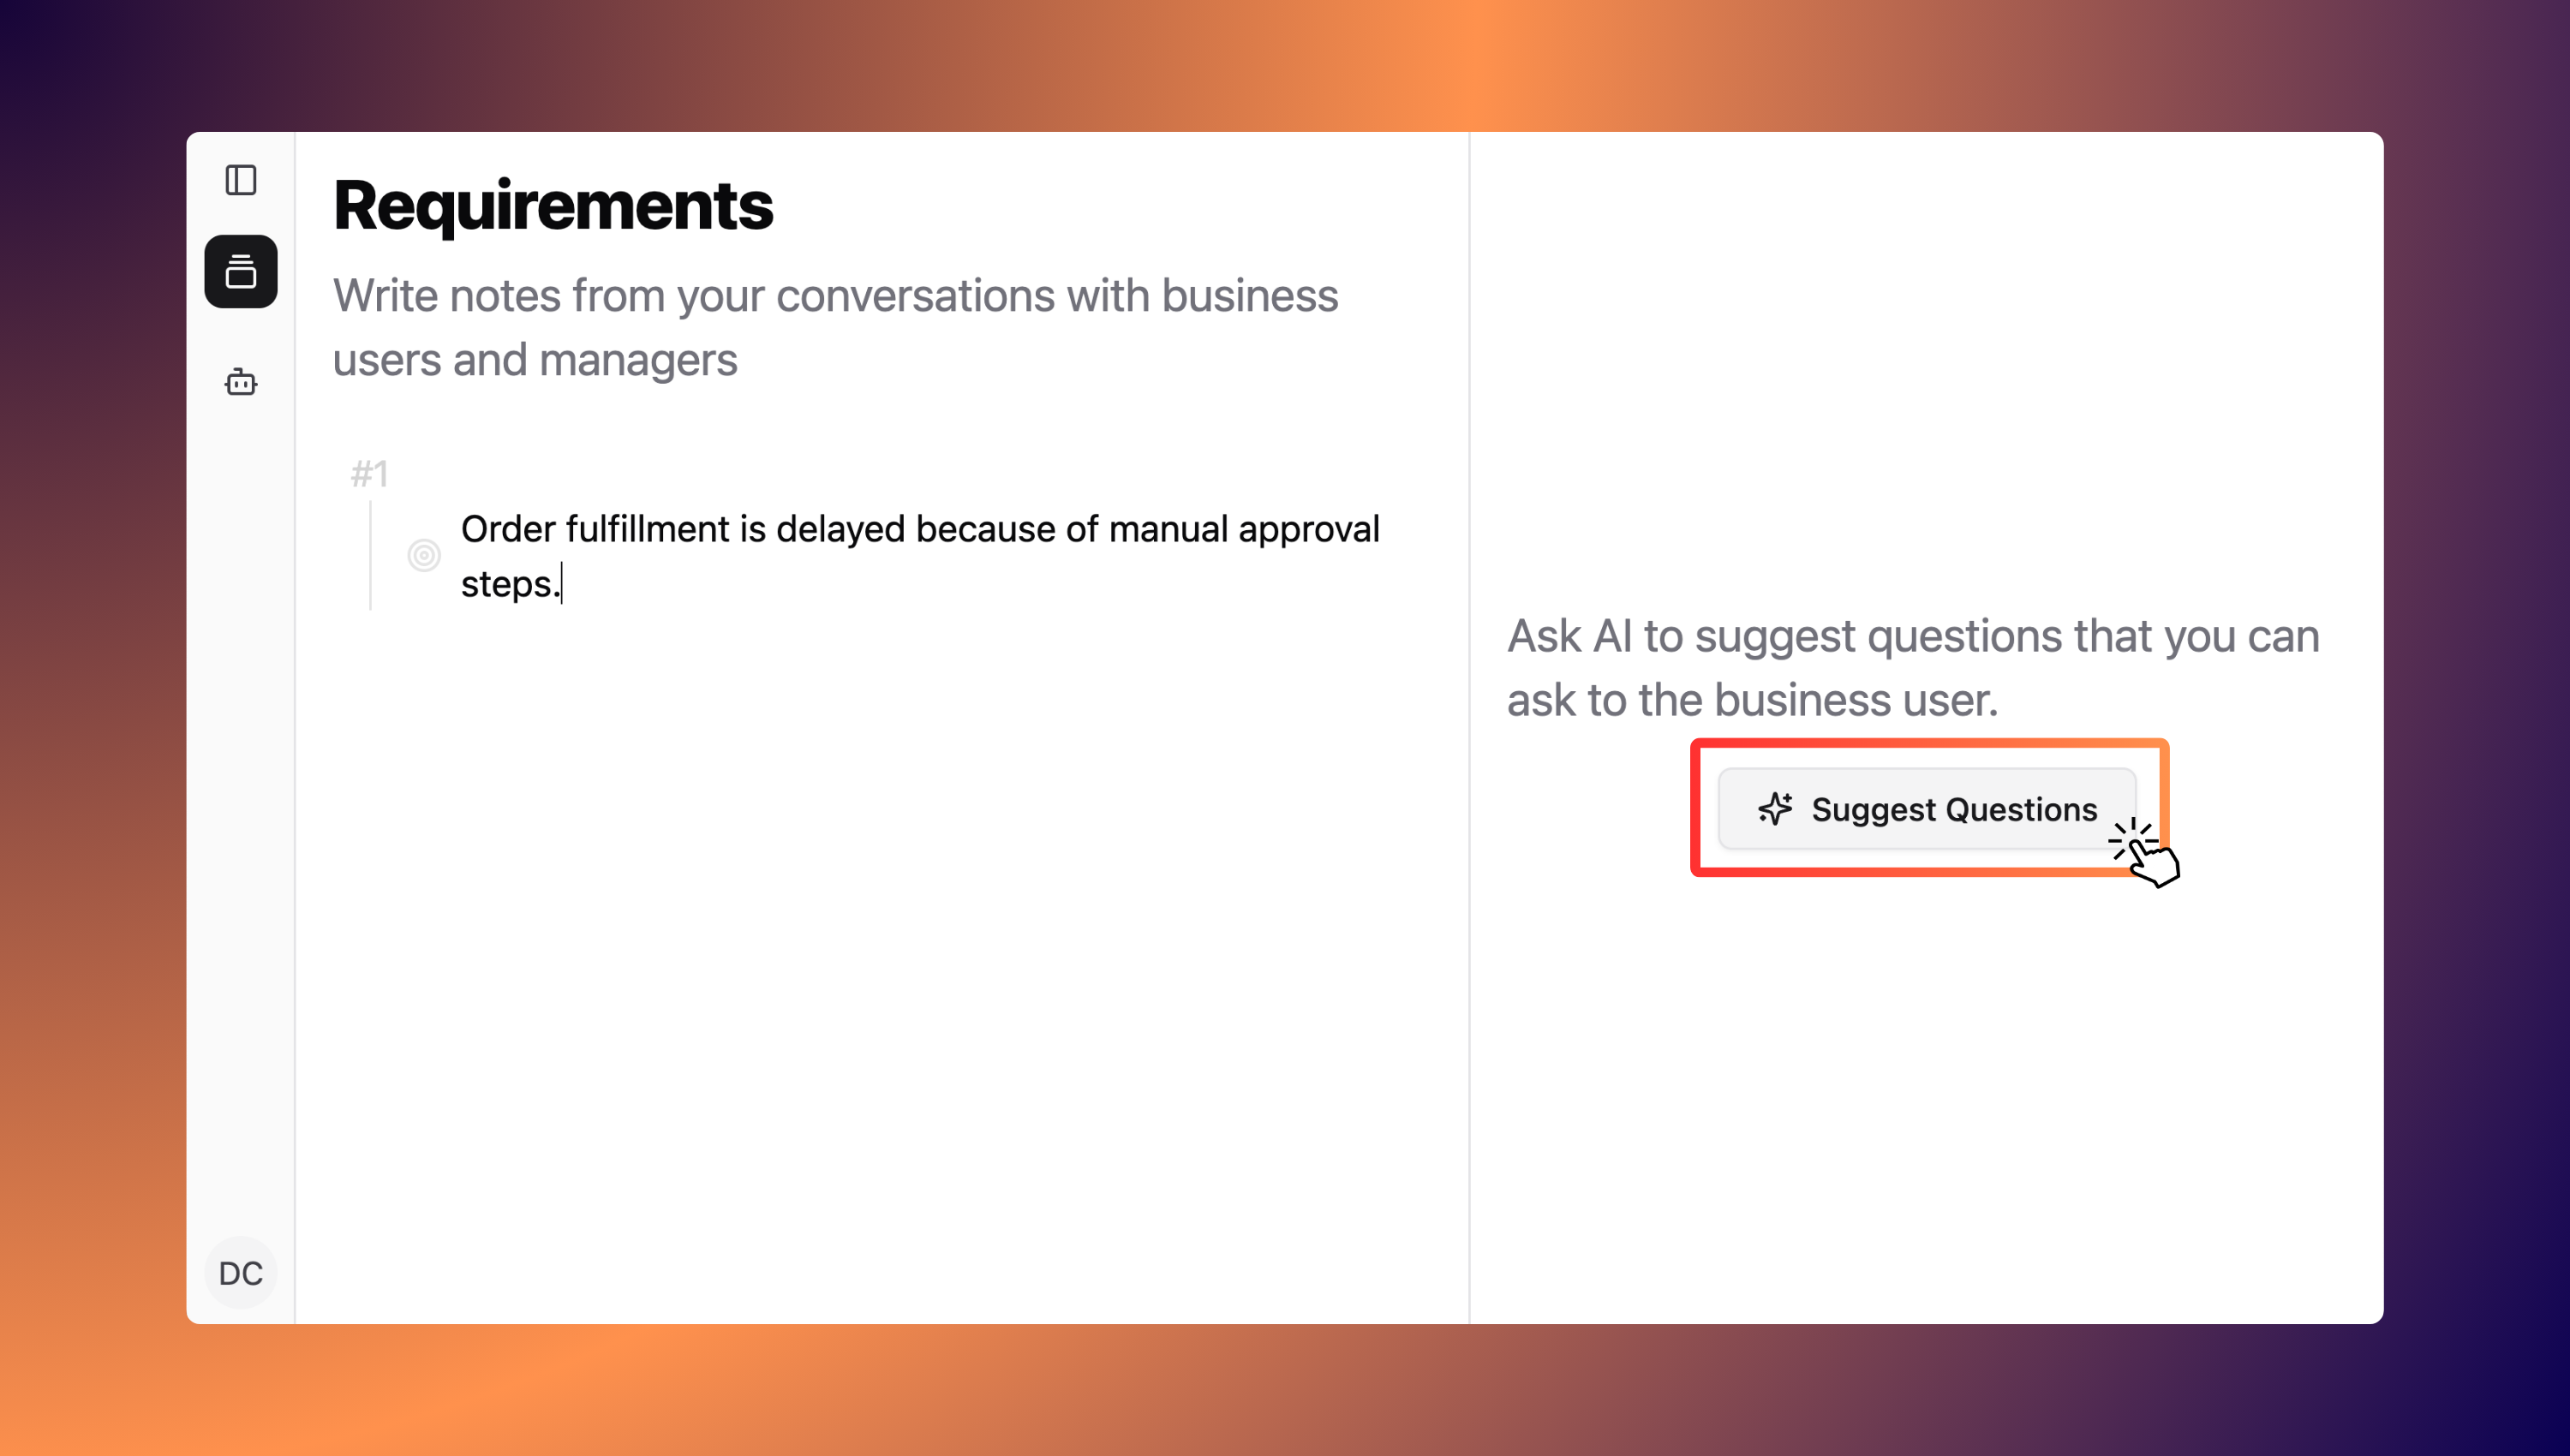
Generate clarifying questions
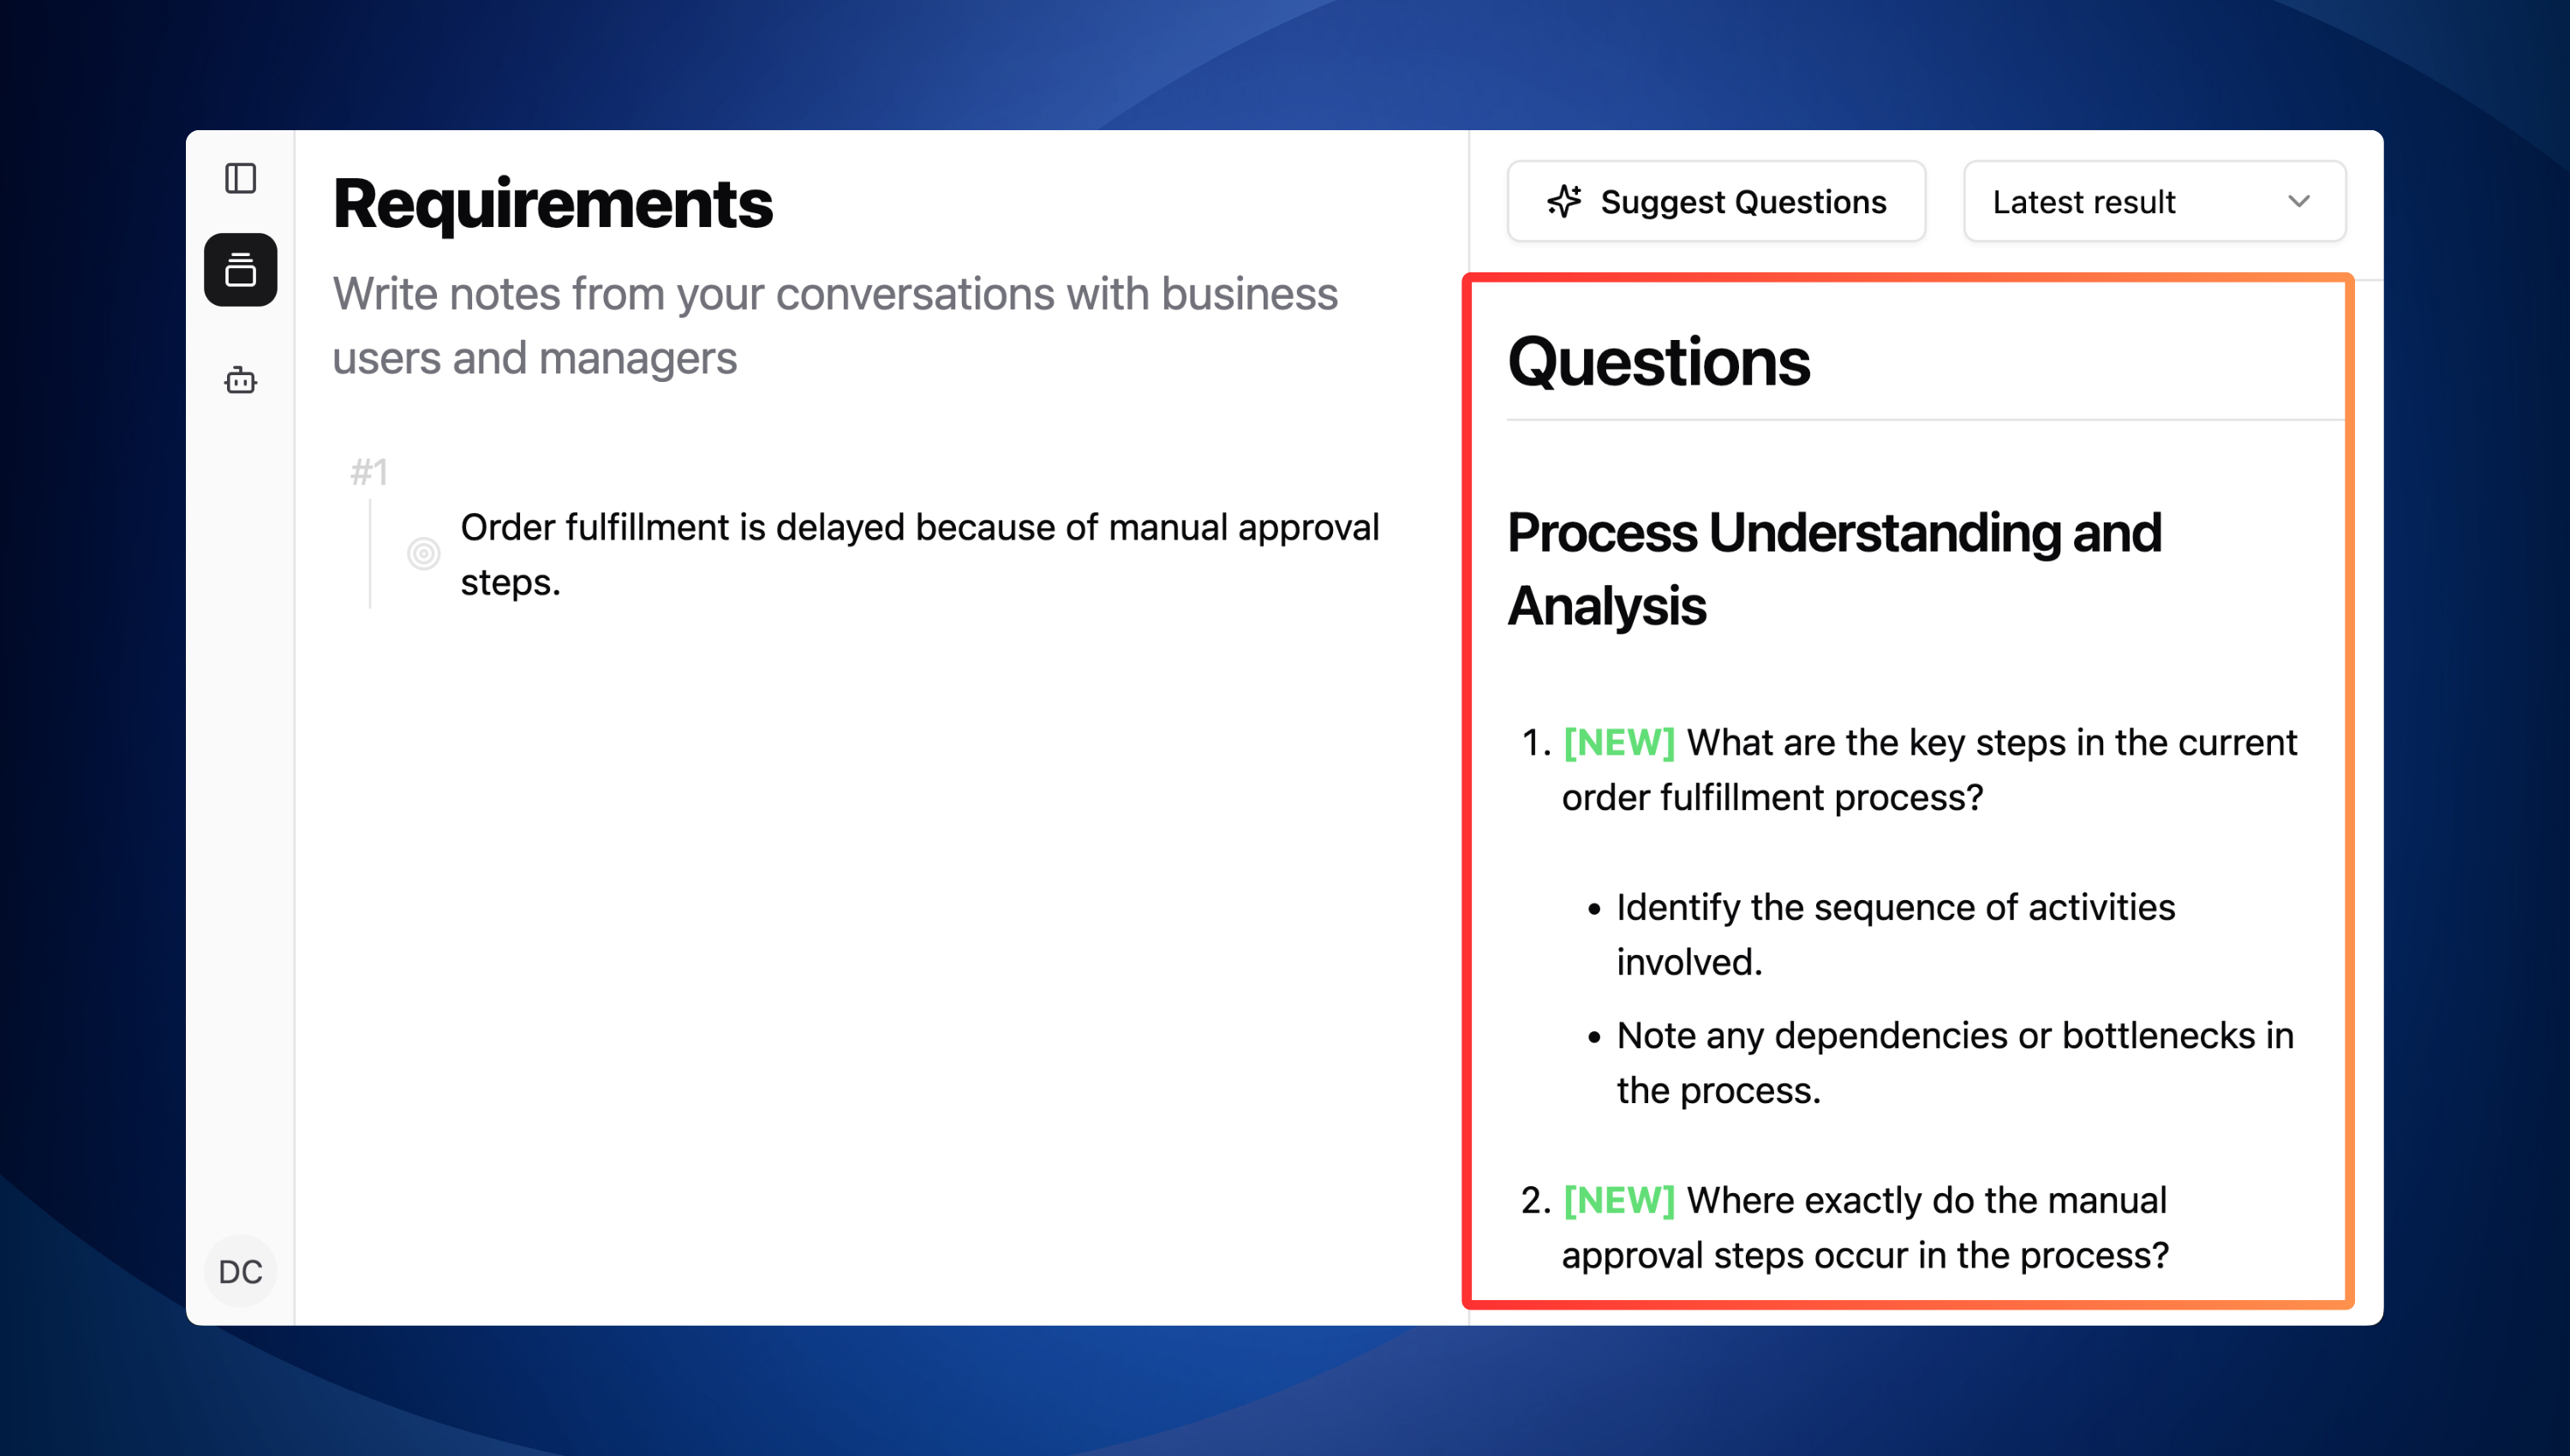
AI-generated clarifying questions
Step 5: Add new business requirements
Let’s say you have asked a few of the AI-suggested questions during your discussion with the business user and gathered additional insights. Now, it’s time to add those insights to your notebook. Just press Enter to create a new line, and start typing your notes. For this test, feel free to copy and paste the sample notes provided below.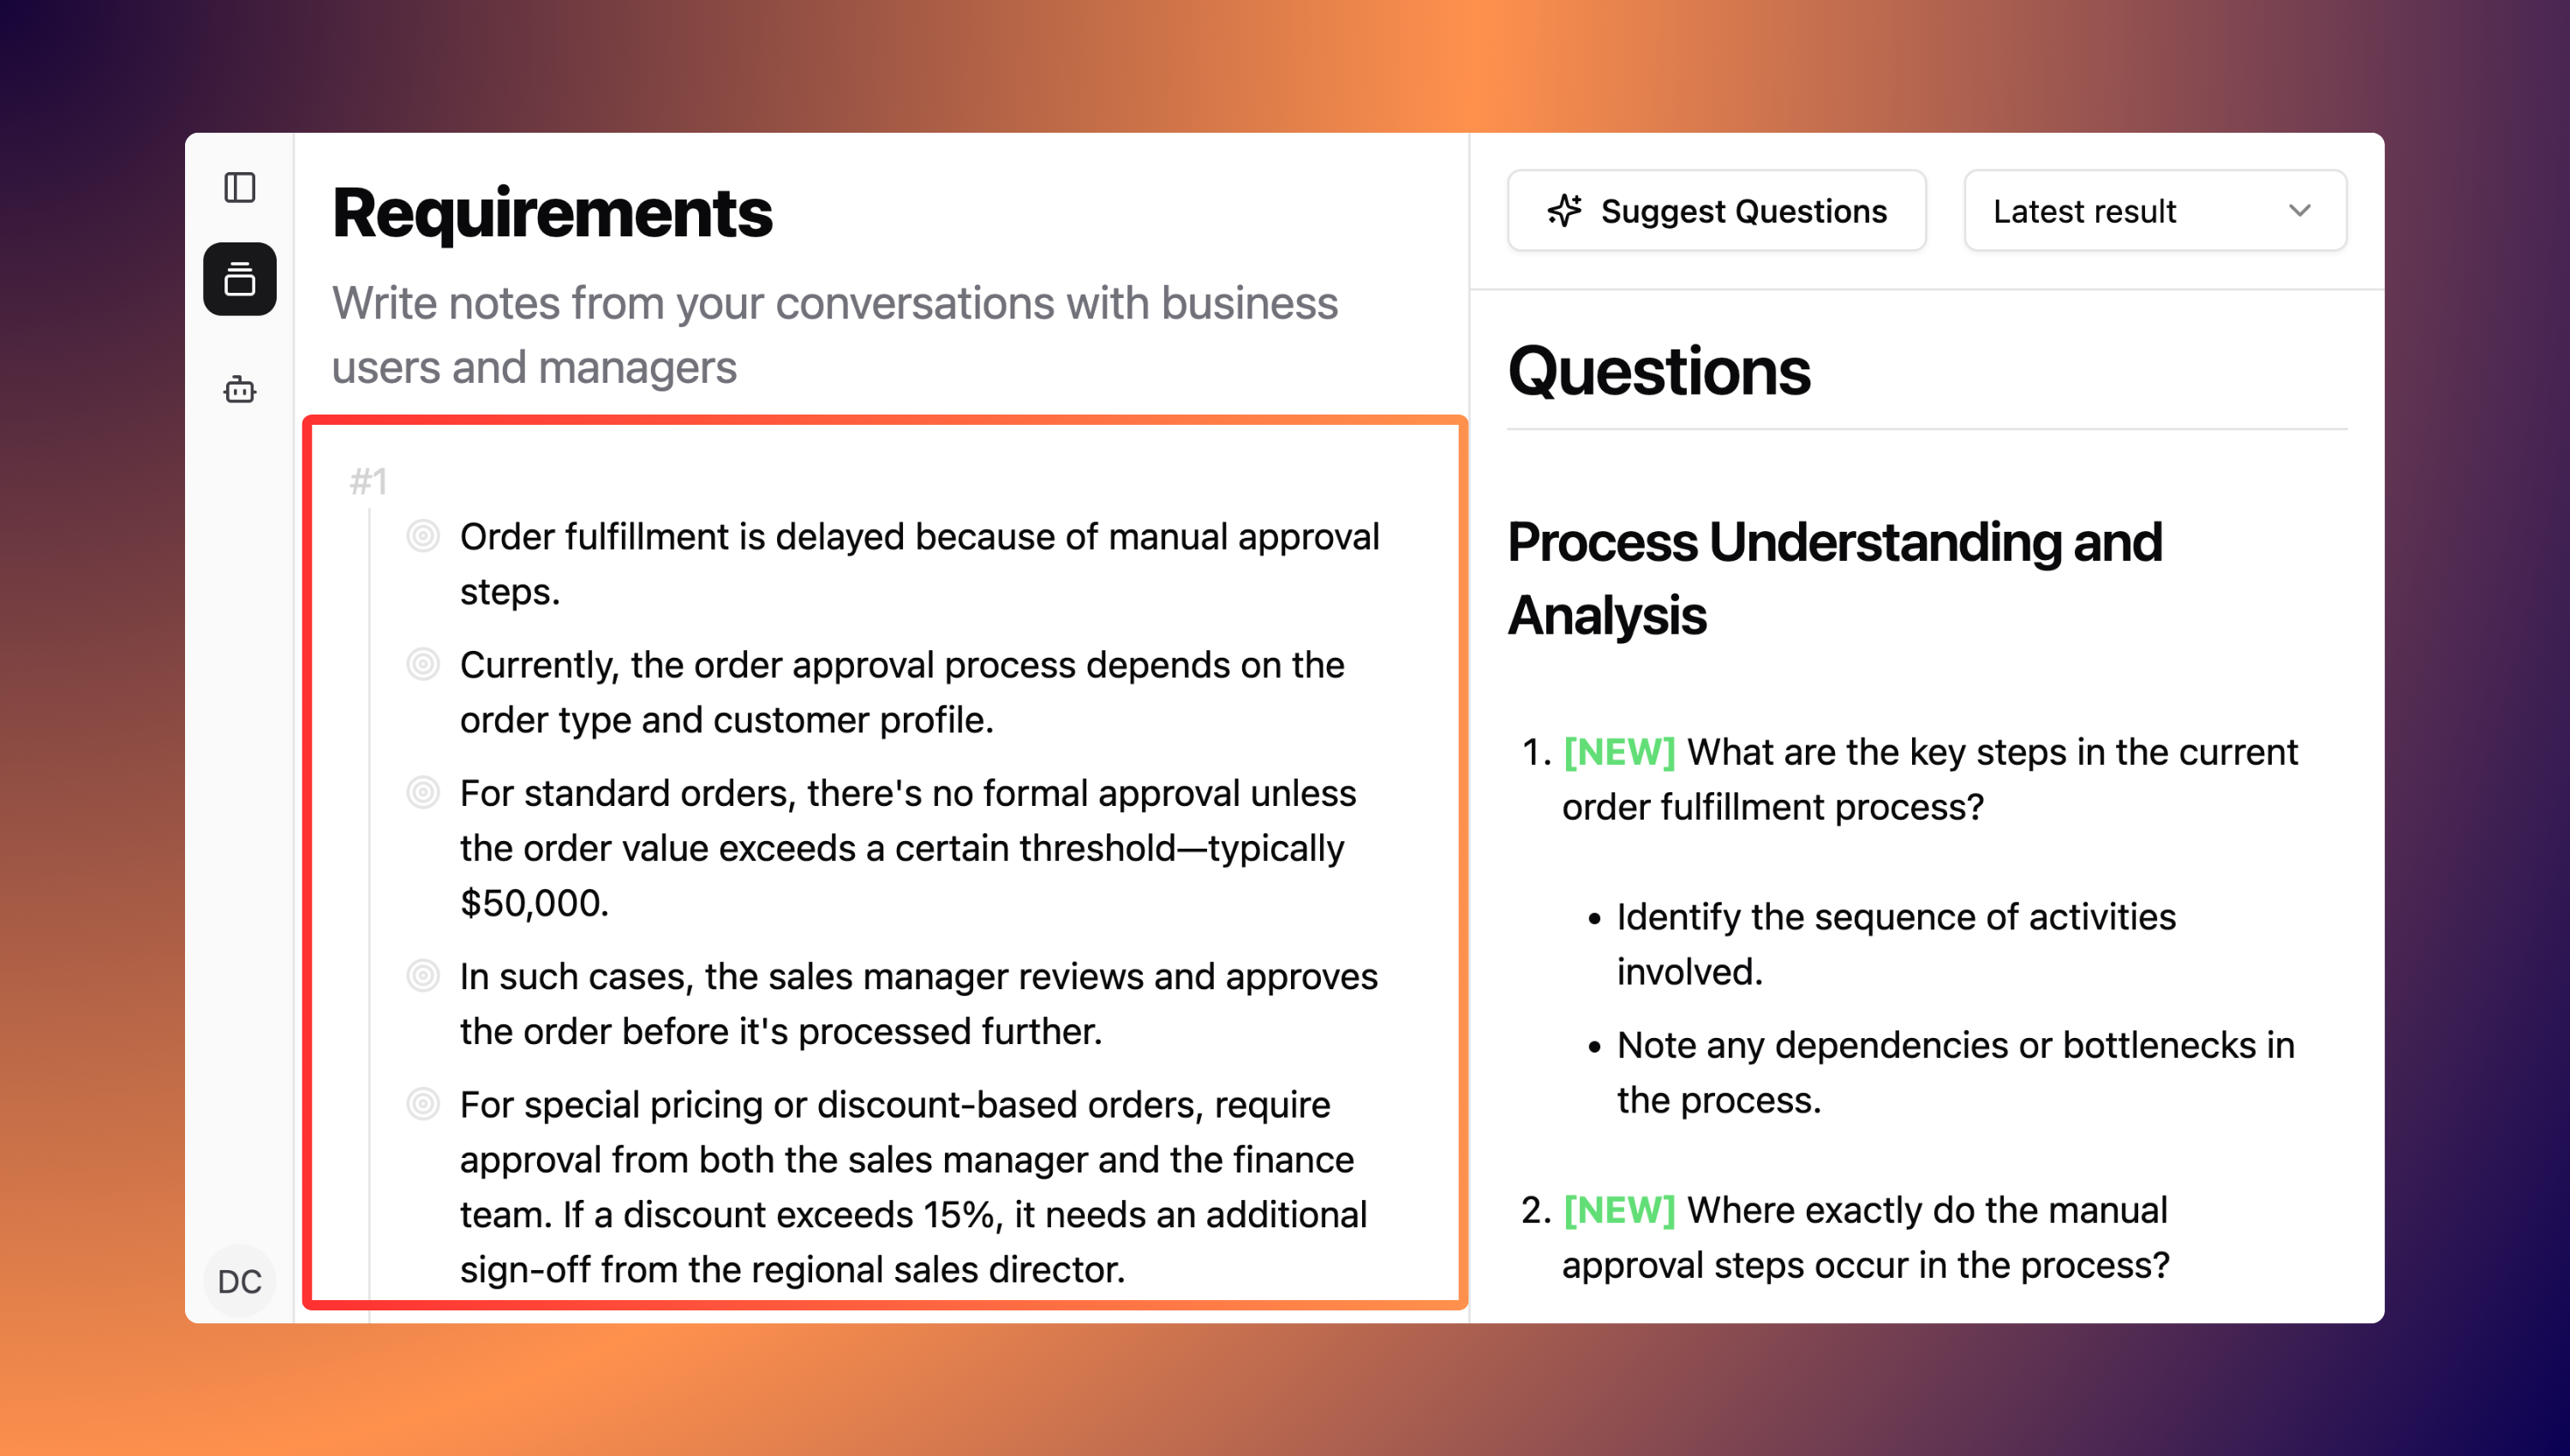
Additional business requirements
Step 6: Generate new questions
Click Suggest Questions button again to get a fresh set of questions based on your updated notes. The AI will take a moment to process the new information and then generate additional questions.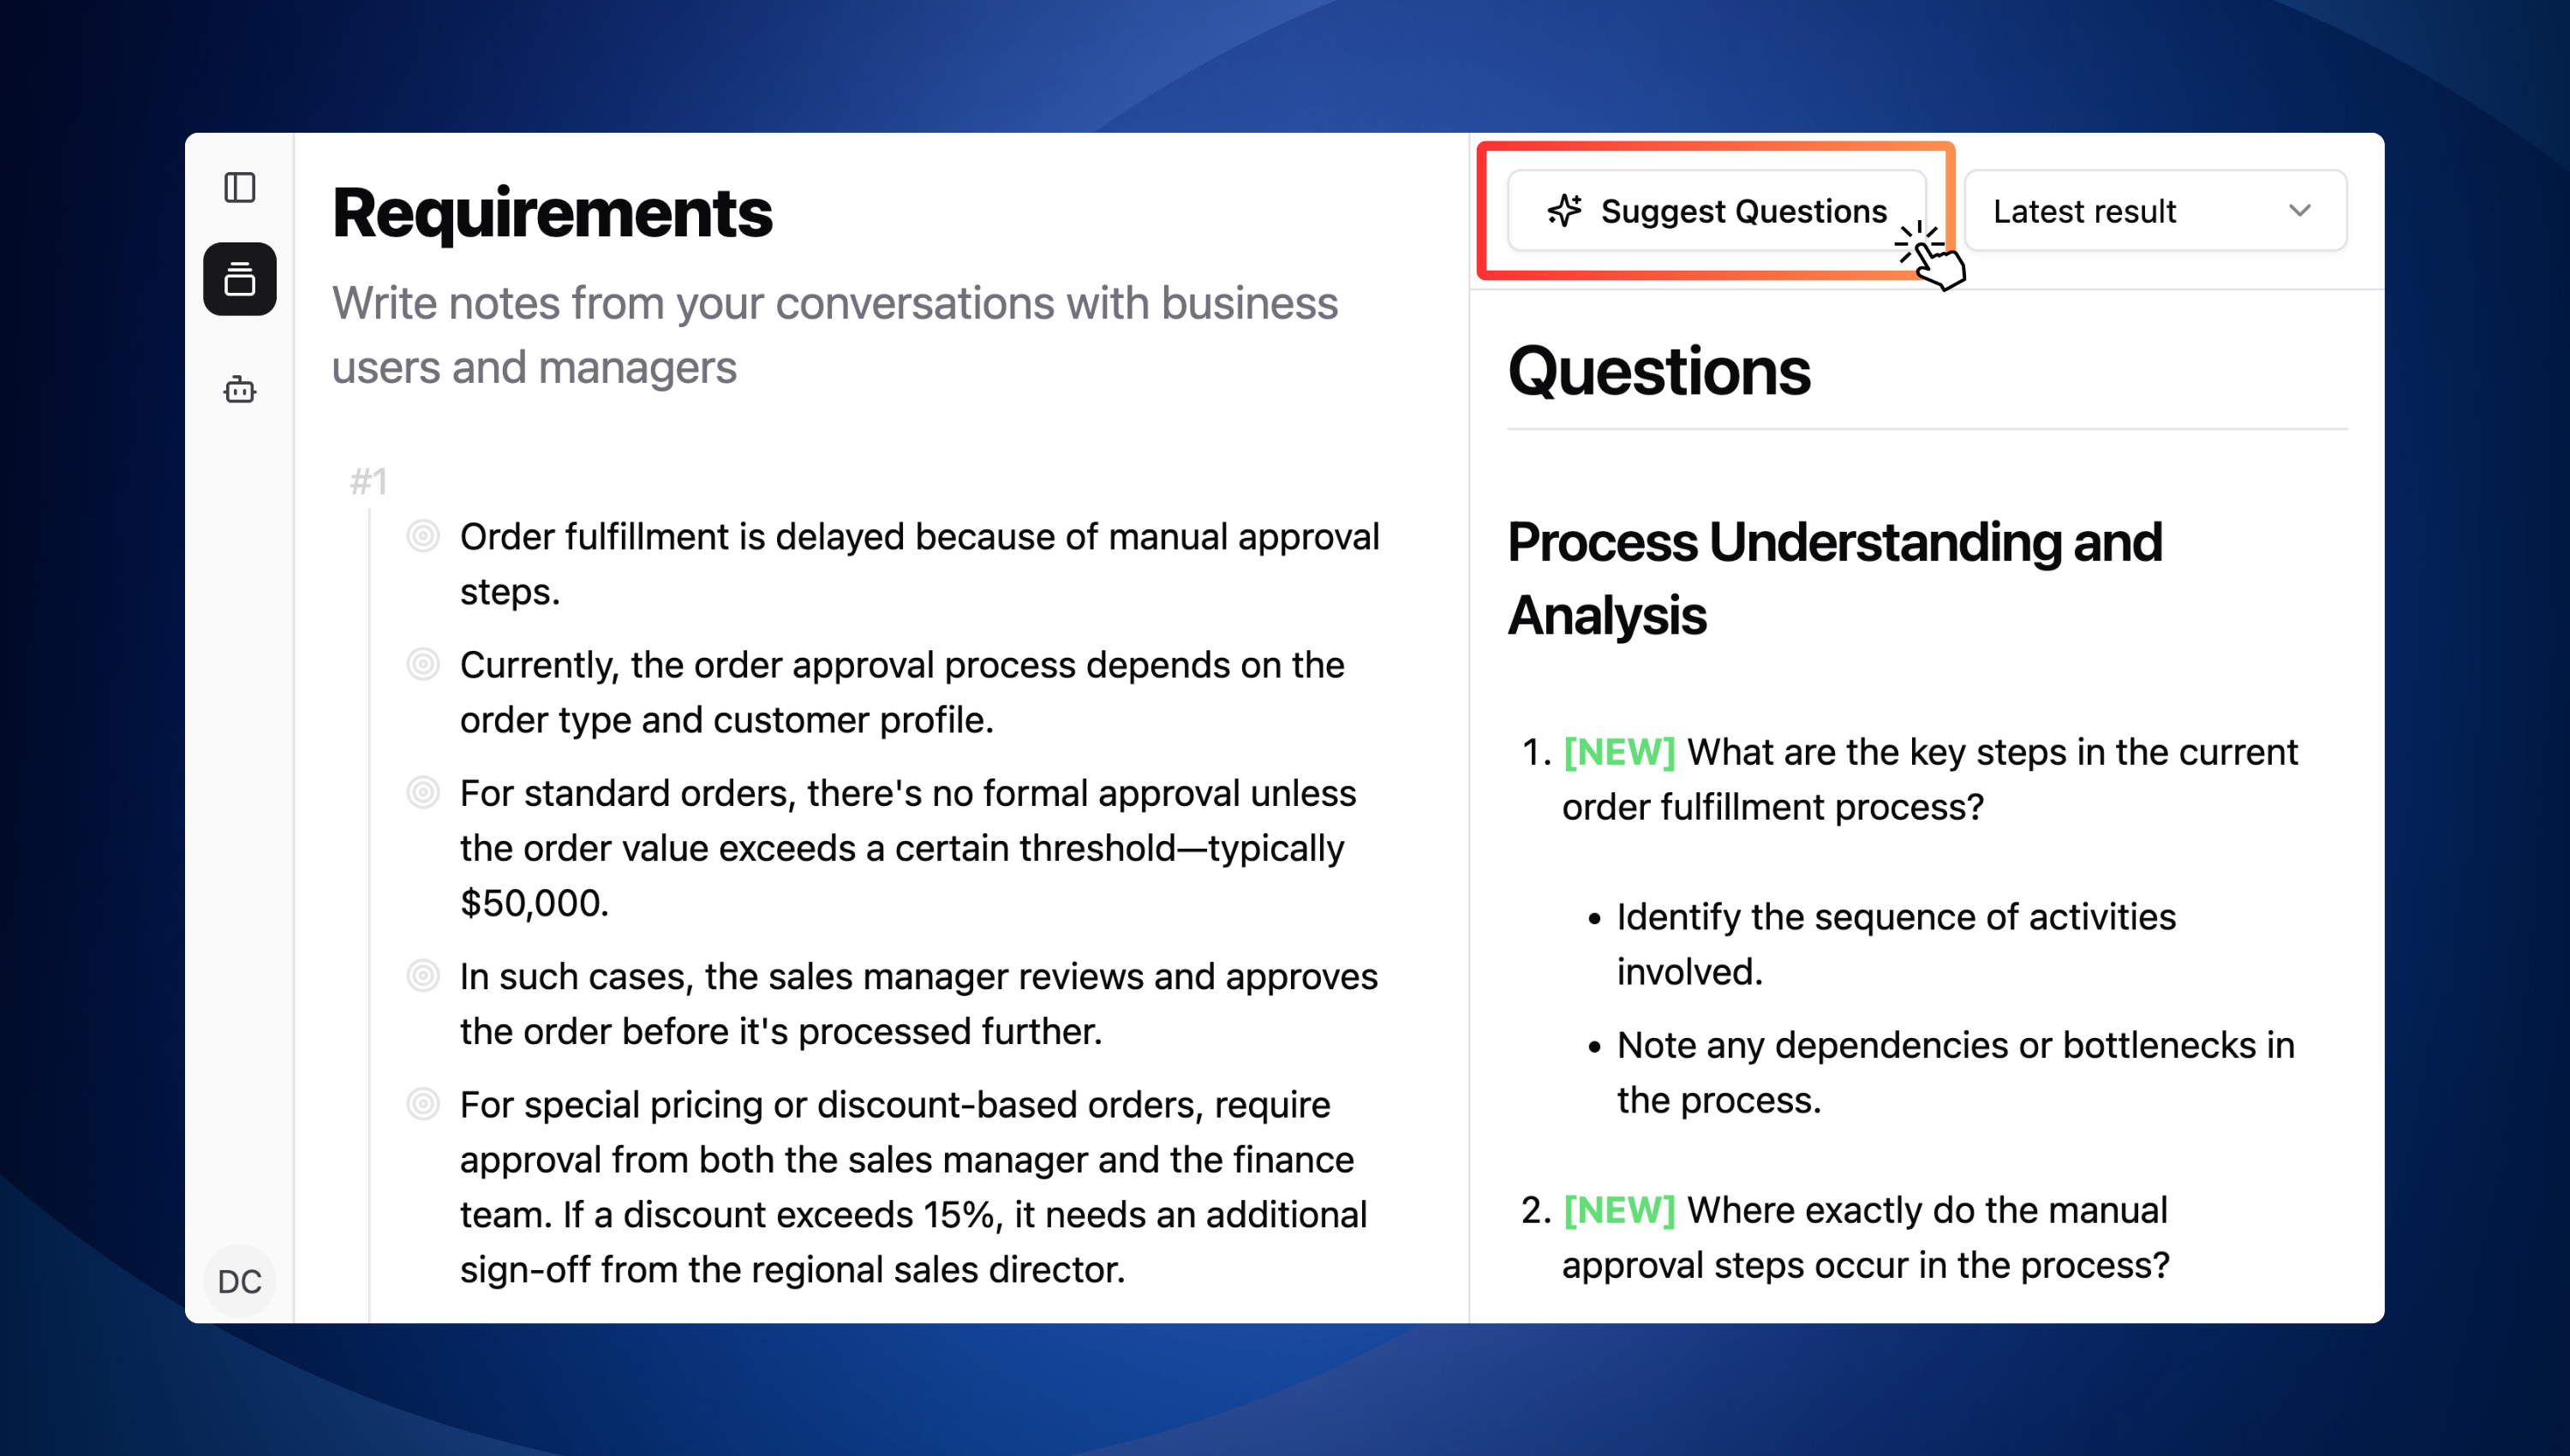
Generate new questions
- [NEW] label for newly added questions
- [ANSWERED] label in a few previously generated questions if AI finds relevant answers in your notes
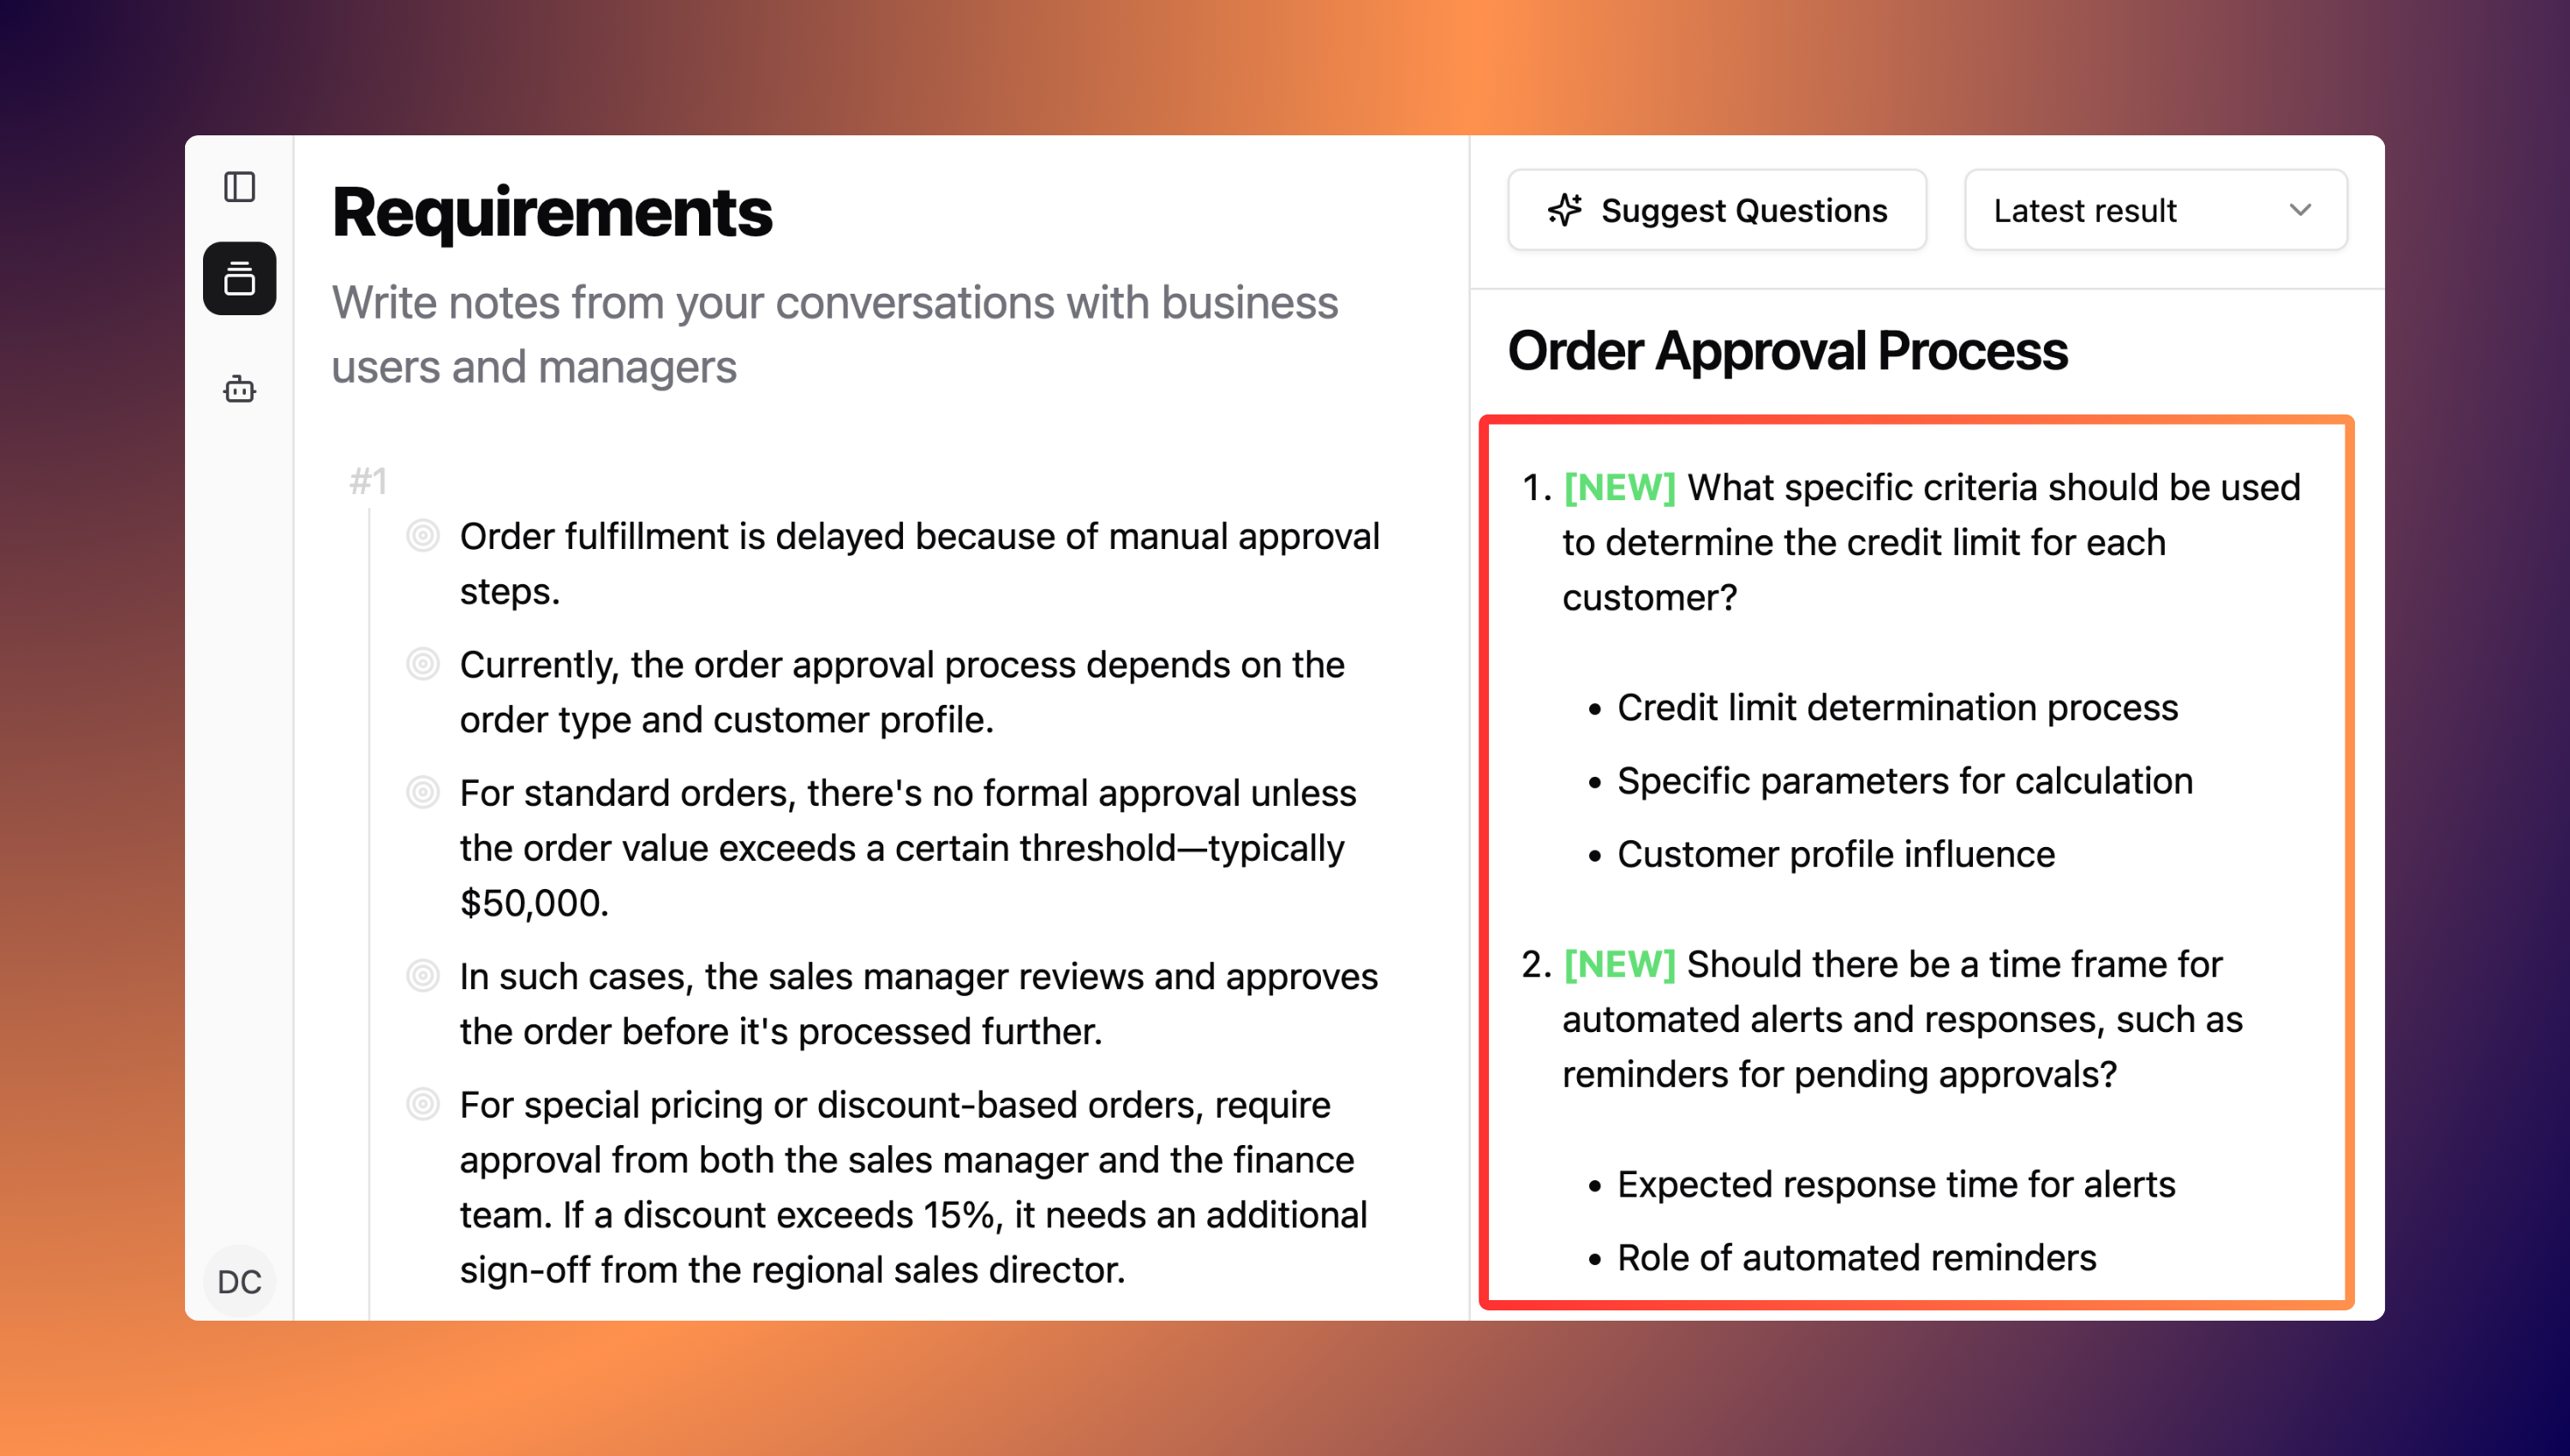
Newly added questions
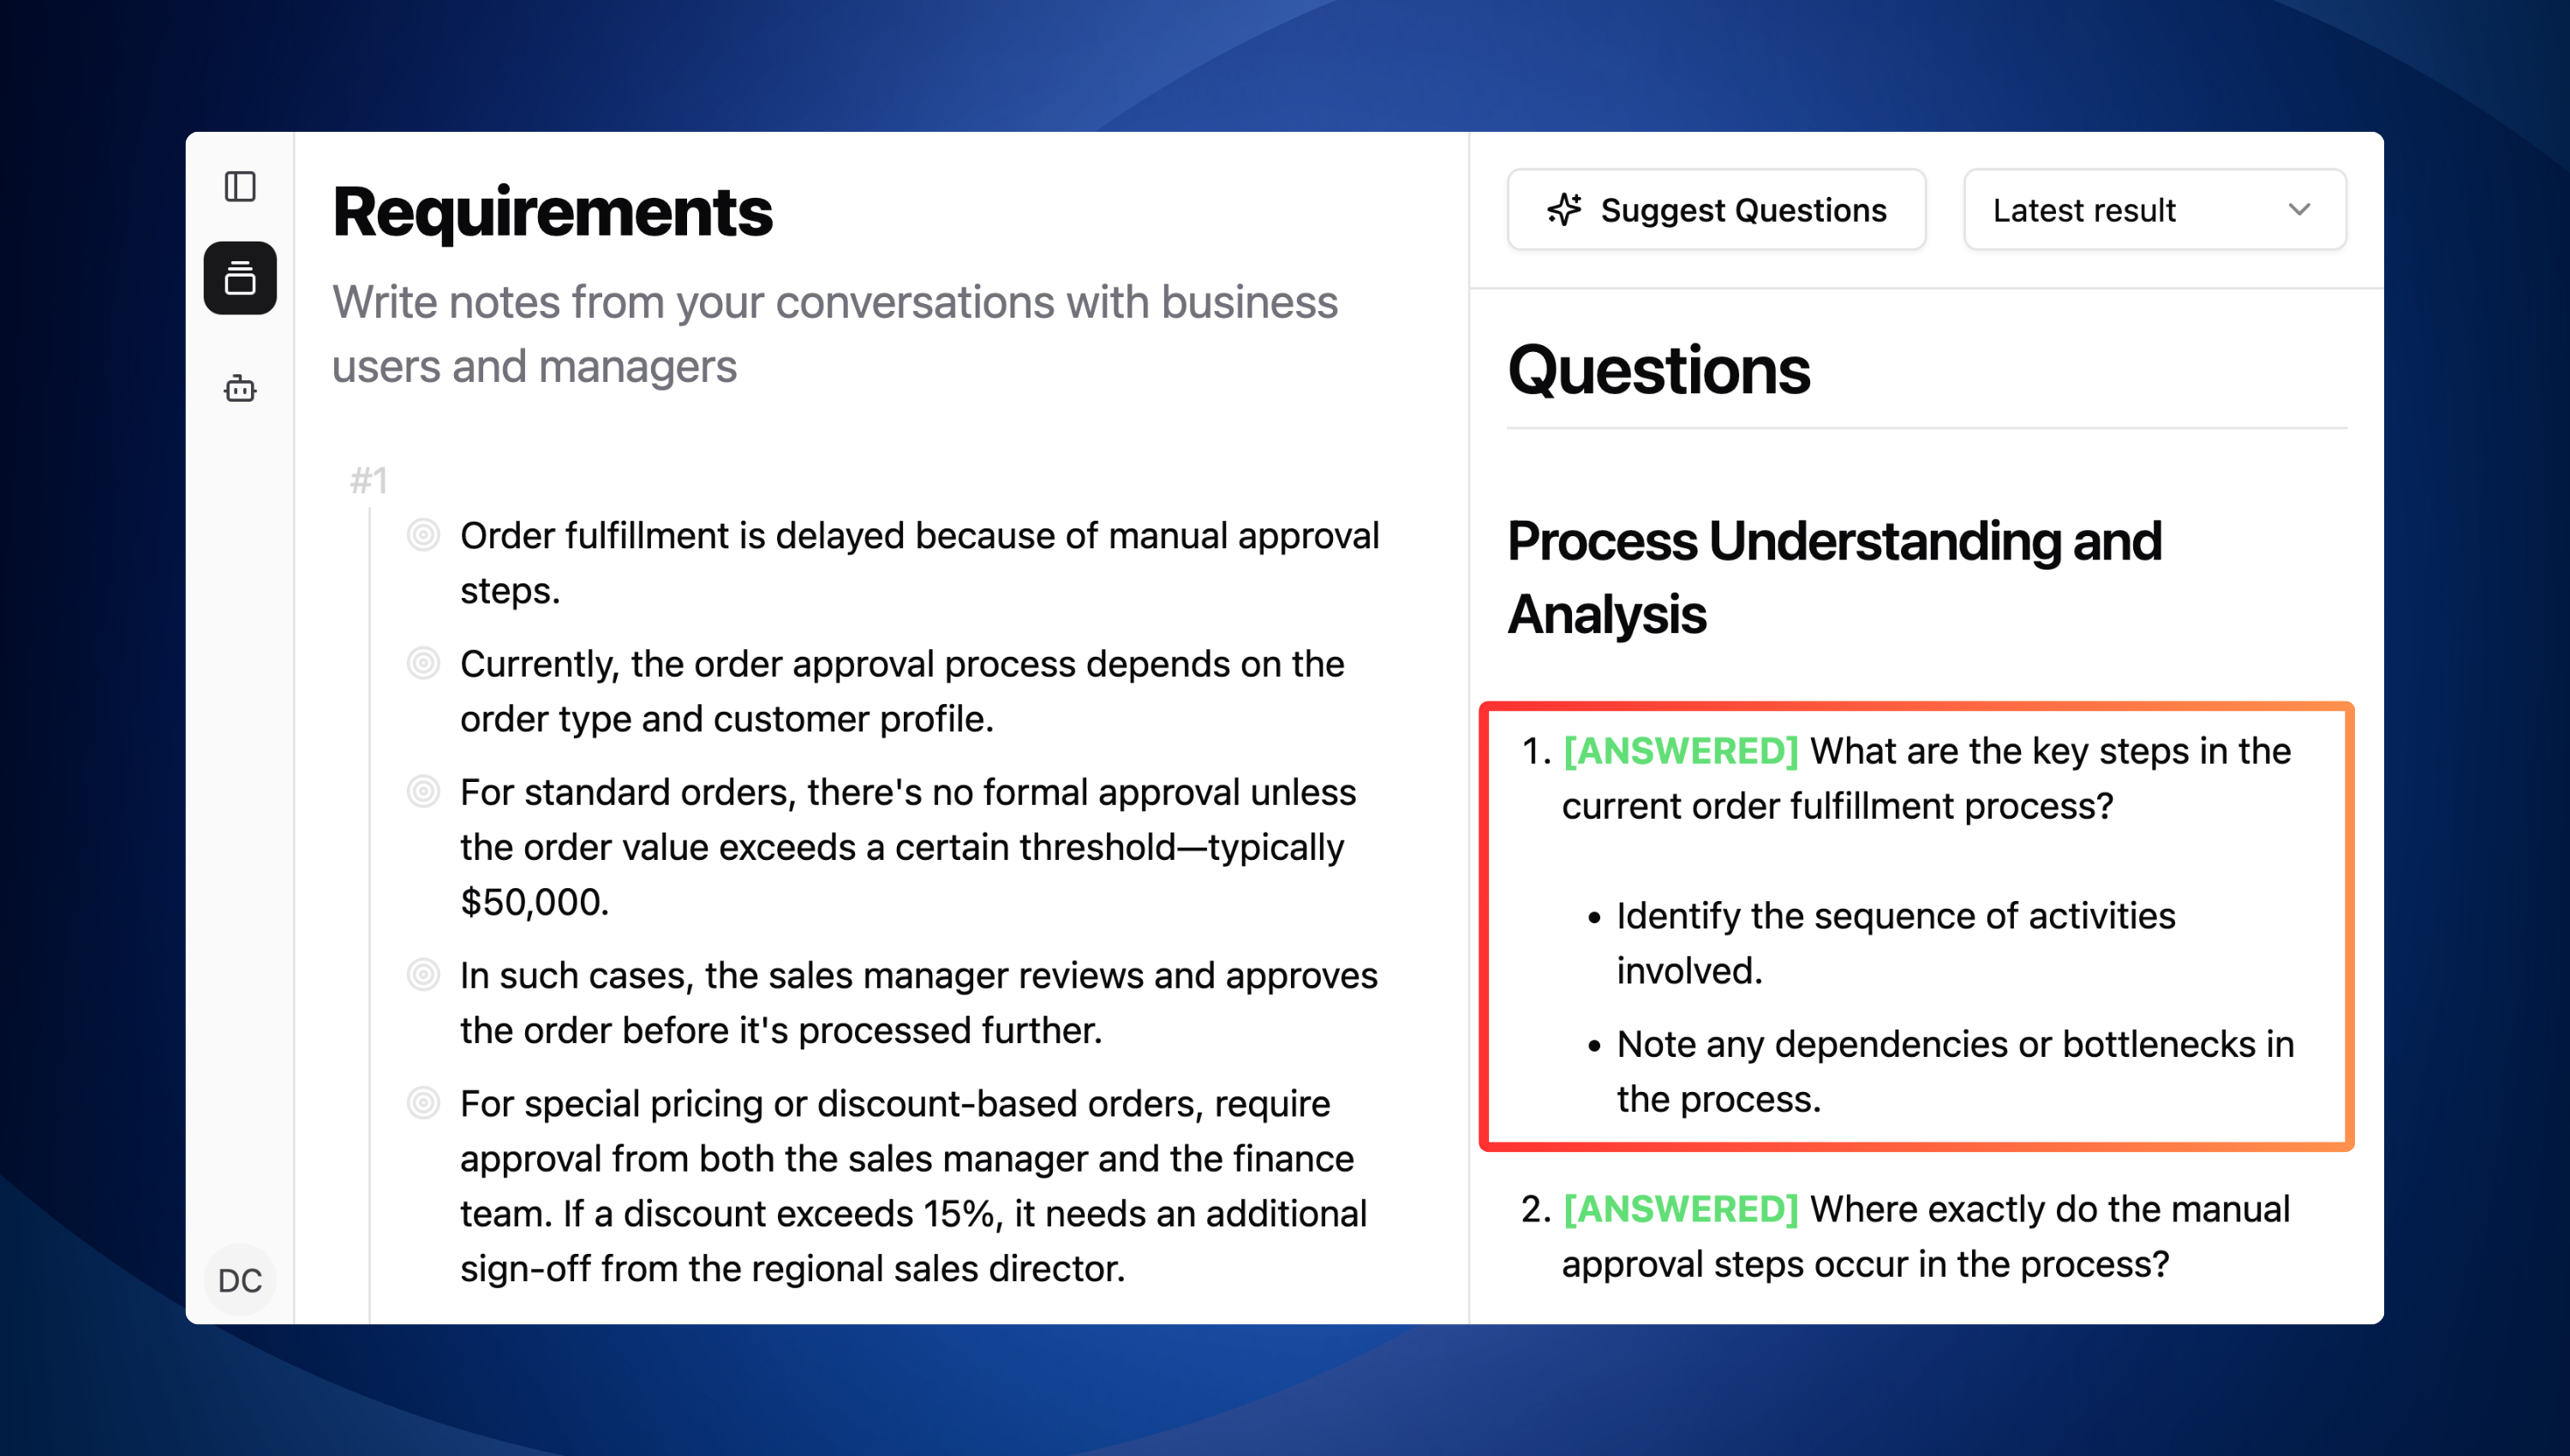
Answered questions
Congratulations! You have successfully tested Adri’s Requirement LM platform.