Add a Provider
Add a provider to your project
Use this guide to connect your own LLM account to an Adri project. It takes about 5 minutes.
In every screenshot, the red box shows exactly where to focus.
Pre-requisites
- Log in to Adri AI: https://www.getadri.ai/login
- An API key from your LLM provider. Get one here if you don't have it yet:
- Anthropic: Anthropic Console → API keys
- OpenAI: OpenAI Platform → API keys
Anthropic (Claude) and OpenAI (GPT) are available today. Other provider types (Google, Azure OpenAI, and more) are coming soon — see the overview for the current list.
Creating the provider and adding its API key are two separate steps. You first save the provider, then edit it to add the key. This page walks through both.
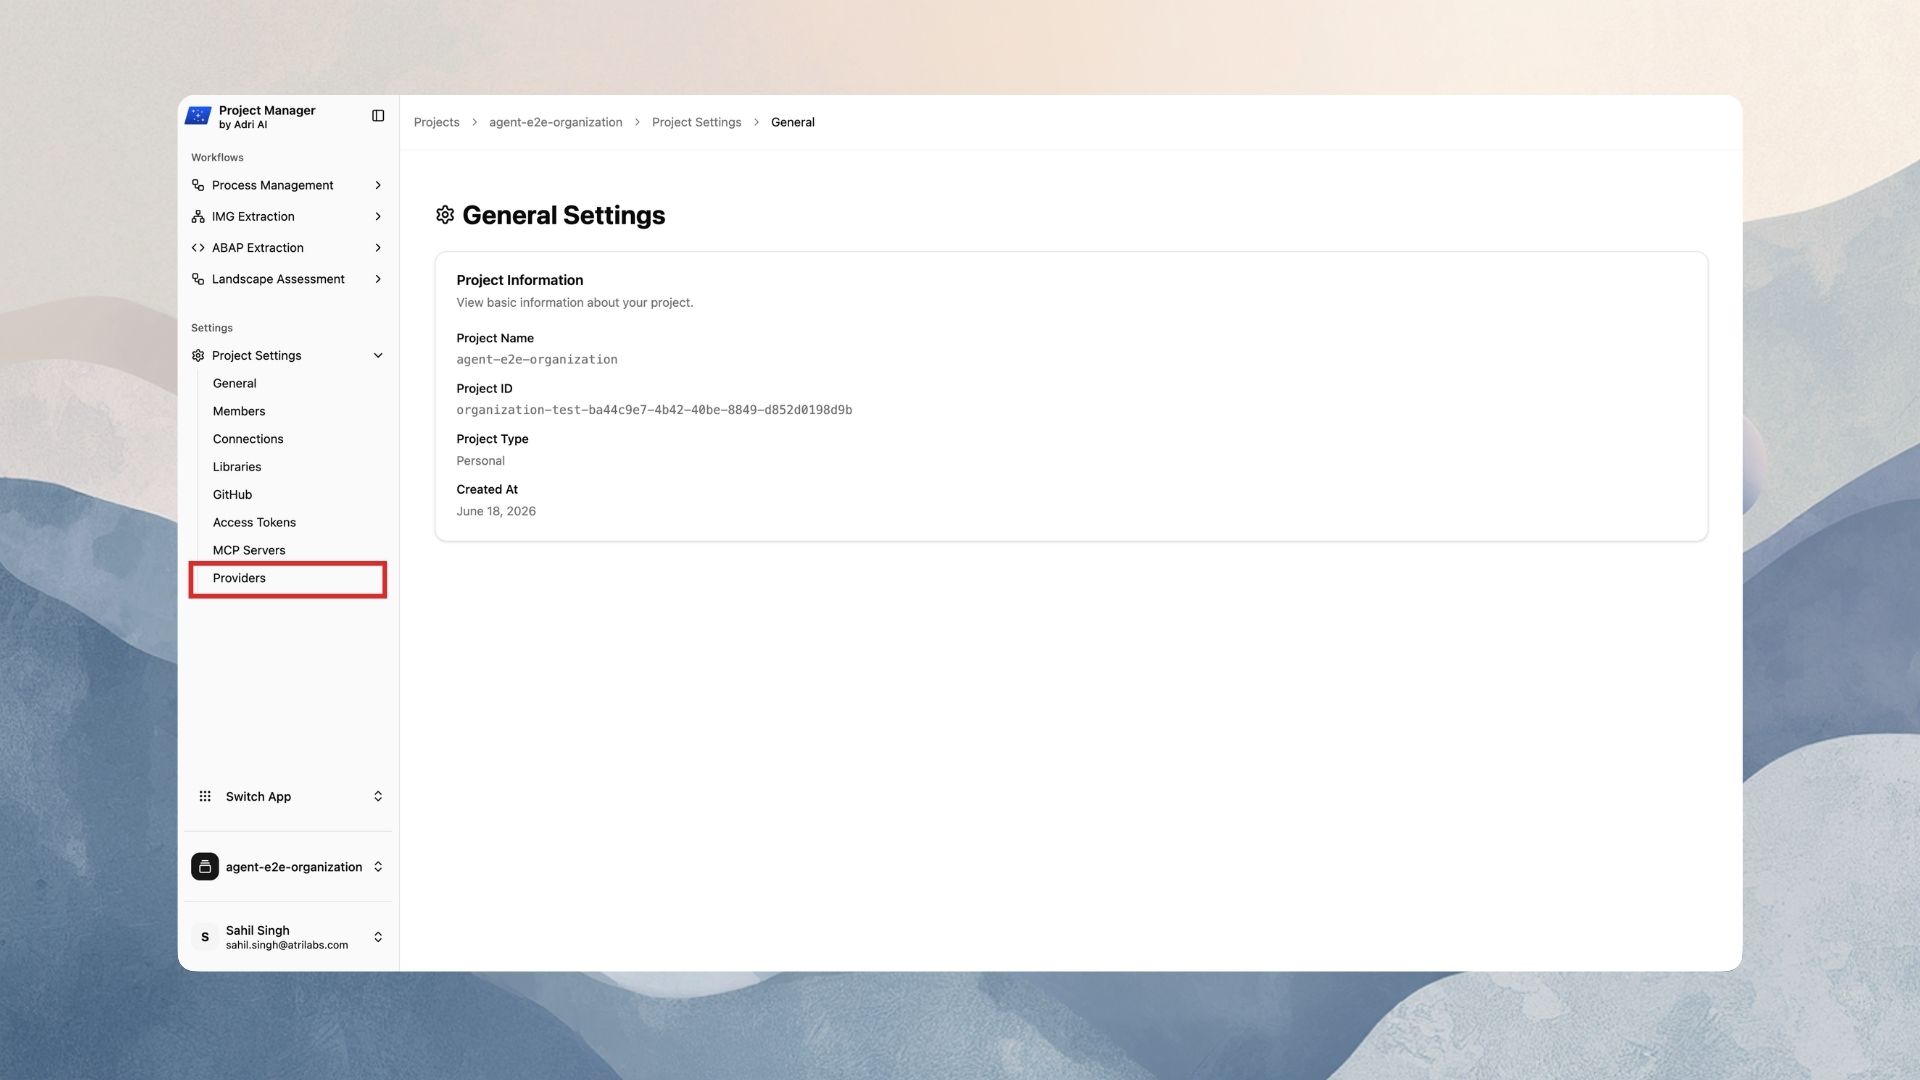
1. Open the Providers settings page
- Open your project in the Adri web app.
- In the left sidebar, scroll to the Settings section.
- Expand Project Settings.
- Click Providers.
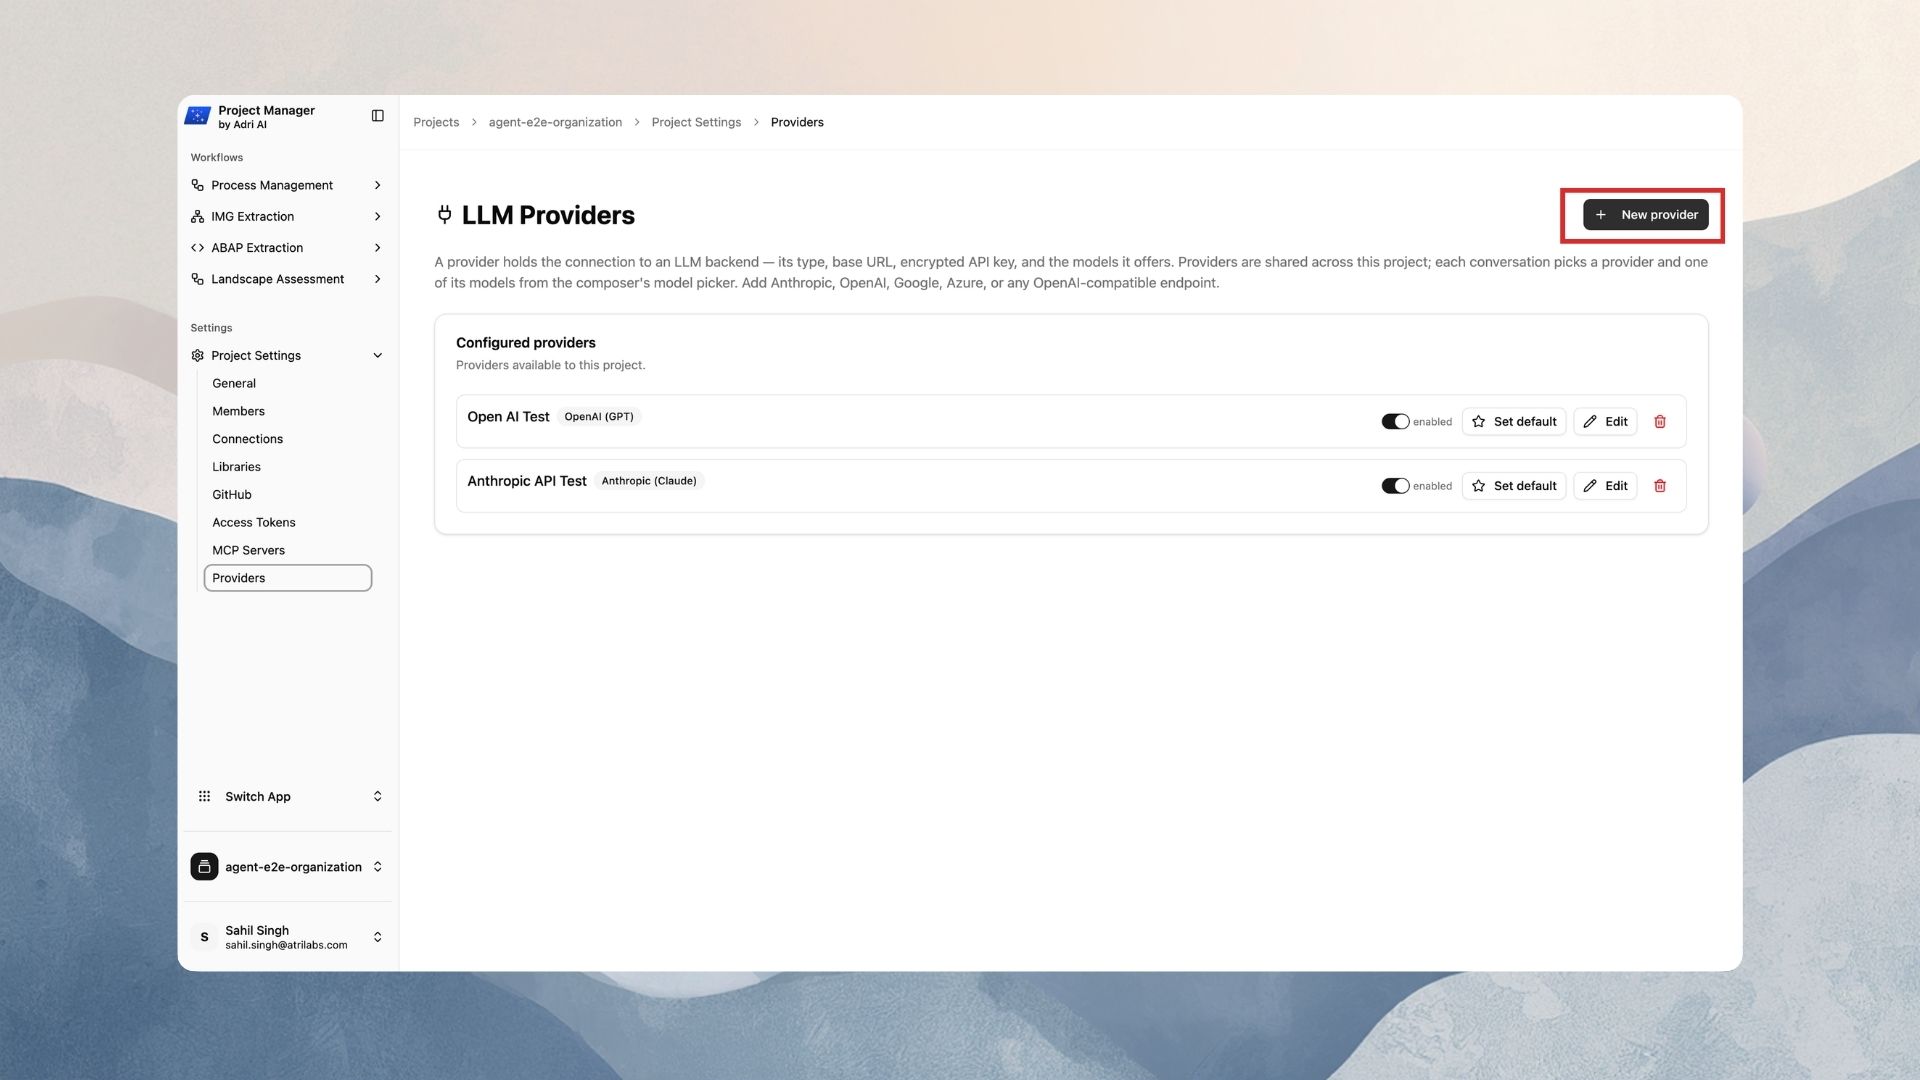
You land on the LLM Providers page. If no provider exists yet, the list shows "No providers yet. Create one to get started."
2. Create the provider
- Click New provider (top right).
-
In the dialog, fill in:
- Provider type — pick
Anthropic (Claude)orOpenAI (GPT). - Name — any name you like, e.g.
Production Anthropic. This is what teammates see in the model picker. - Enabled — leave the switch on.
Neither type needs a Base URL — Adri already knows the endpoint.
- Provider type — pick
-
Click Create provider.
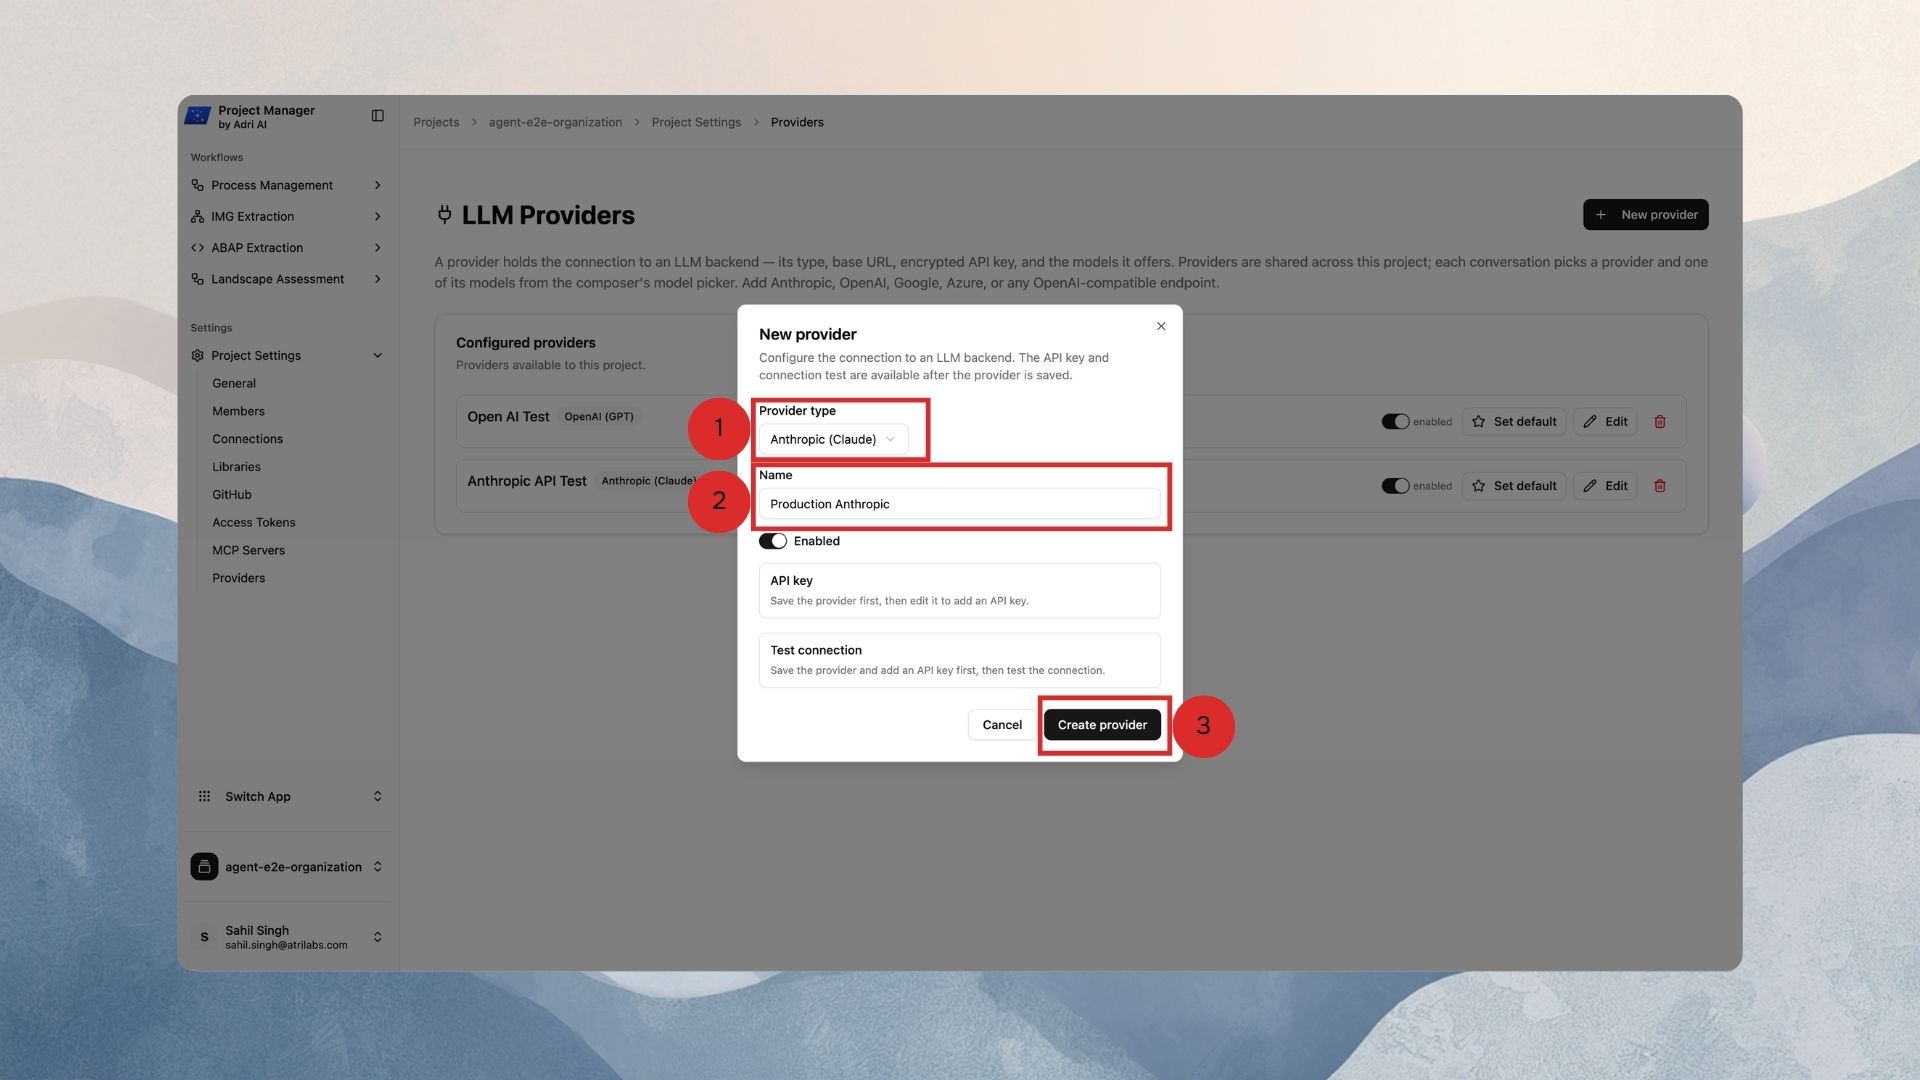
You should see the toast Provider "your name" created and the provider appears in the Configured providers list.
3. Add the API key
The dialog told you: "Save the provider first, then edit it to add an API key." Now that it is saved:
- In the Configured providers list, find your provider.
- Click Edit.
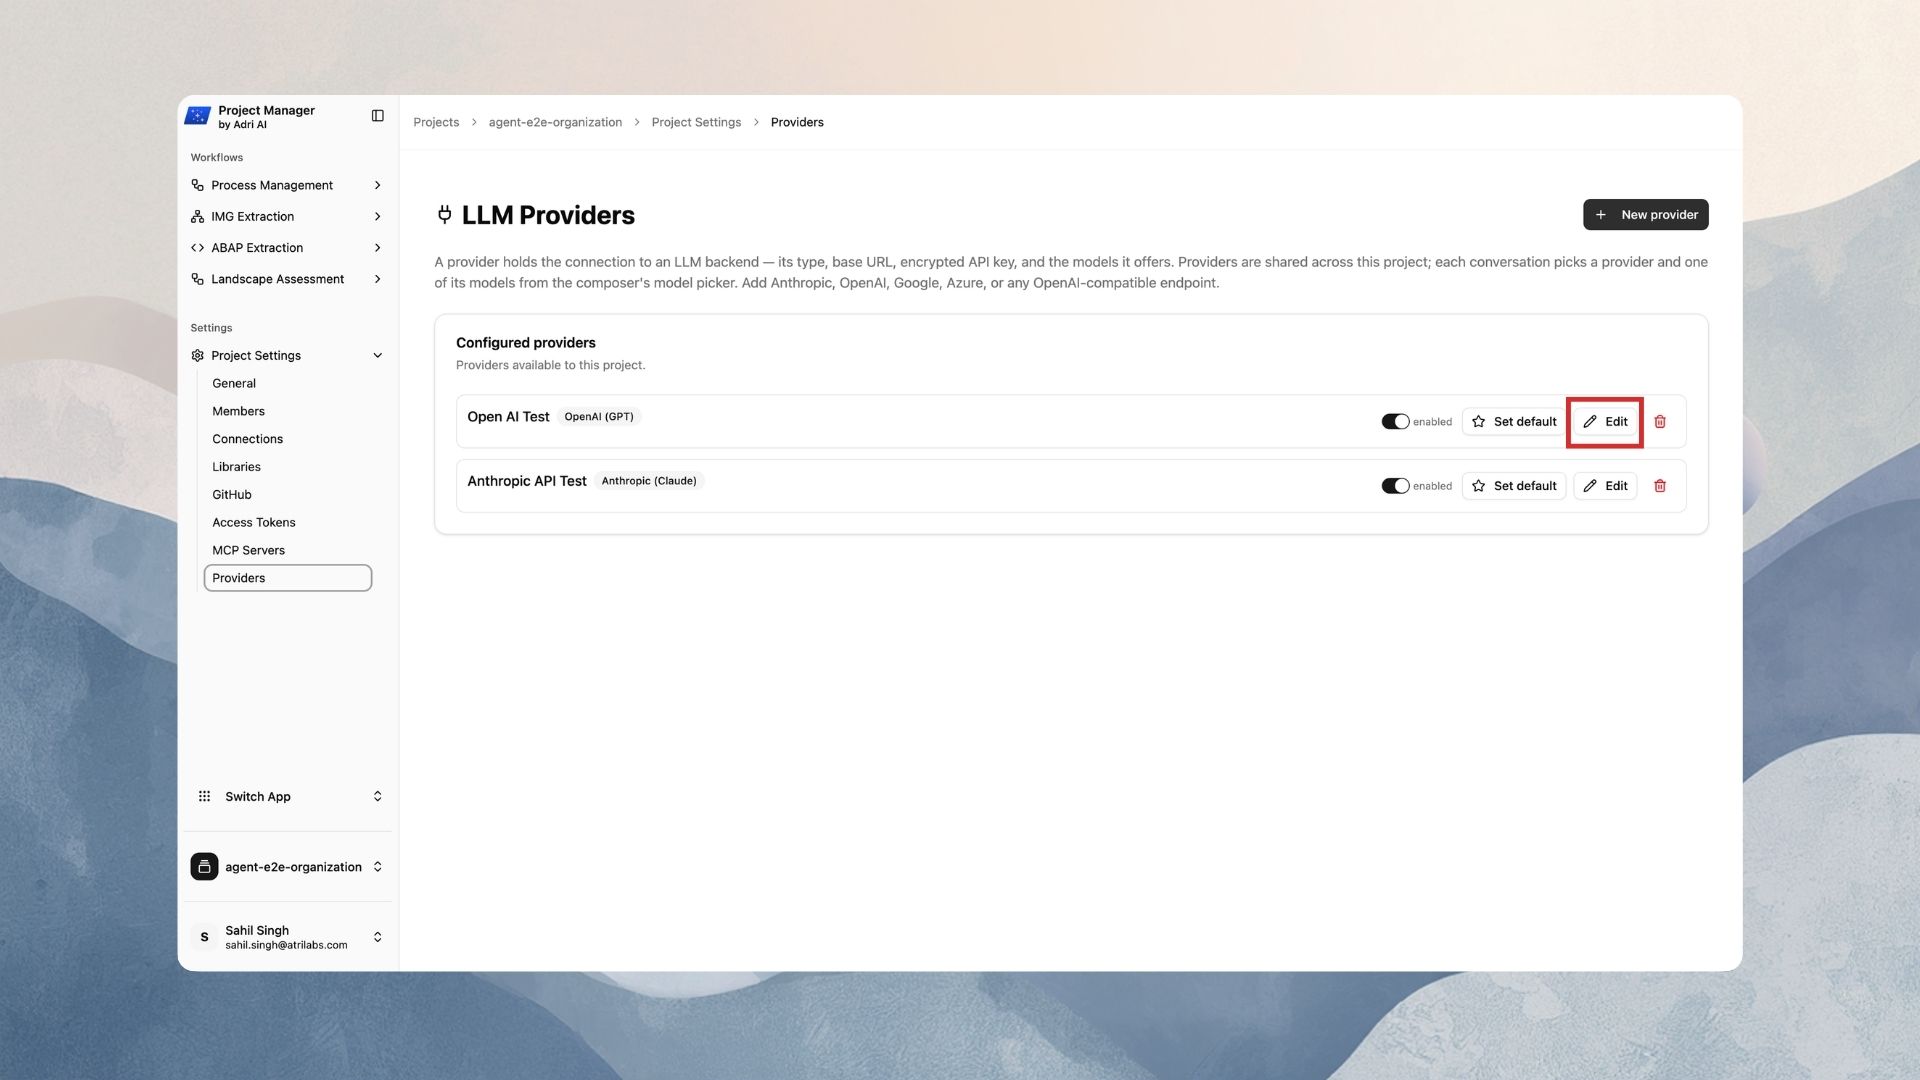
- Find the API key section — the badge reads Not set until a key is saved (Configured once one exists).
- Paste your key into the field.
- Click Save key.
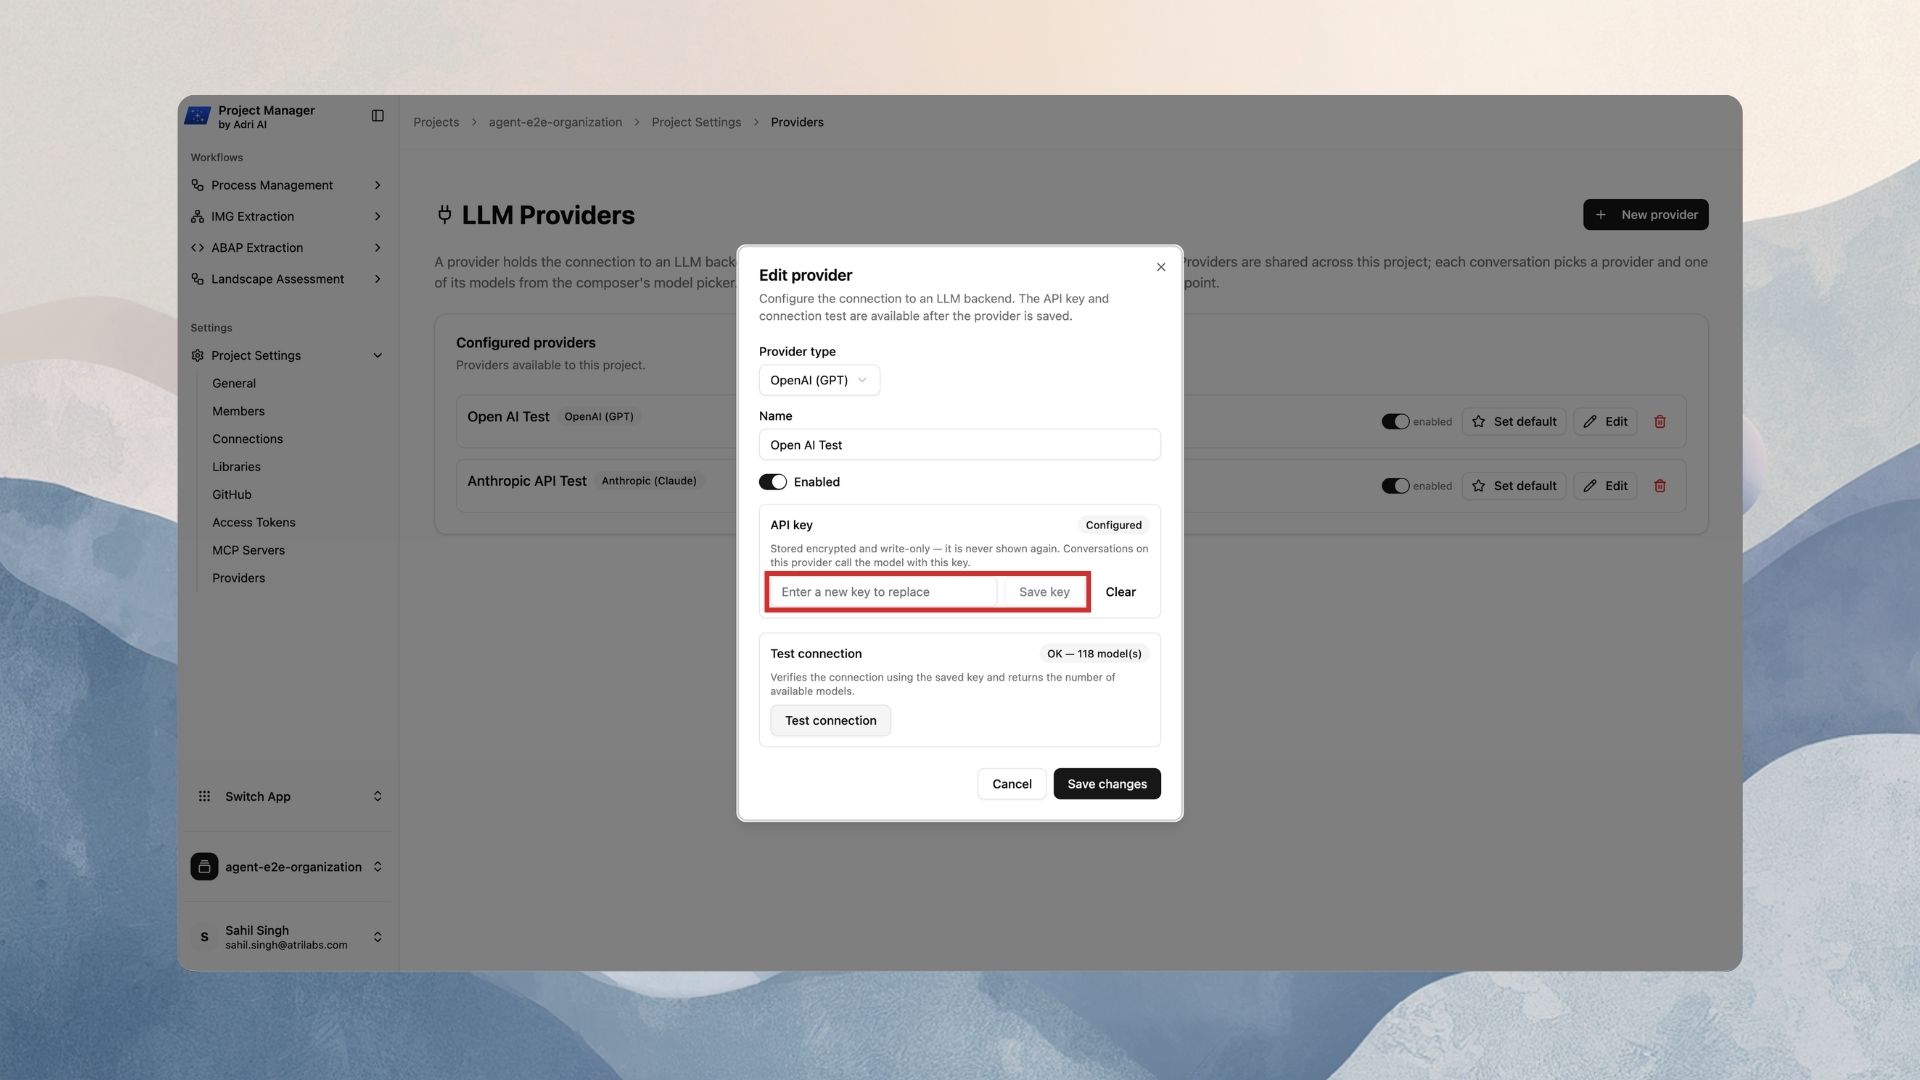
You should see the toast "API key saved" and the badge switches to Configured.
The key is stored encrypted and write-only — it is never shown again, not even to you. If you lose it, just paste a new one over it later. Keep your own copy in a password manager.
4. Test the connection
Still in the edit dialog:
- Find the Test connection section.
- Click Test connection.
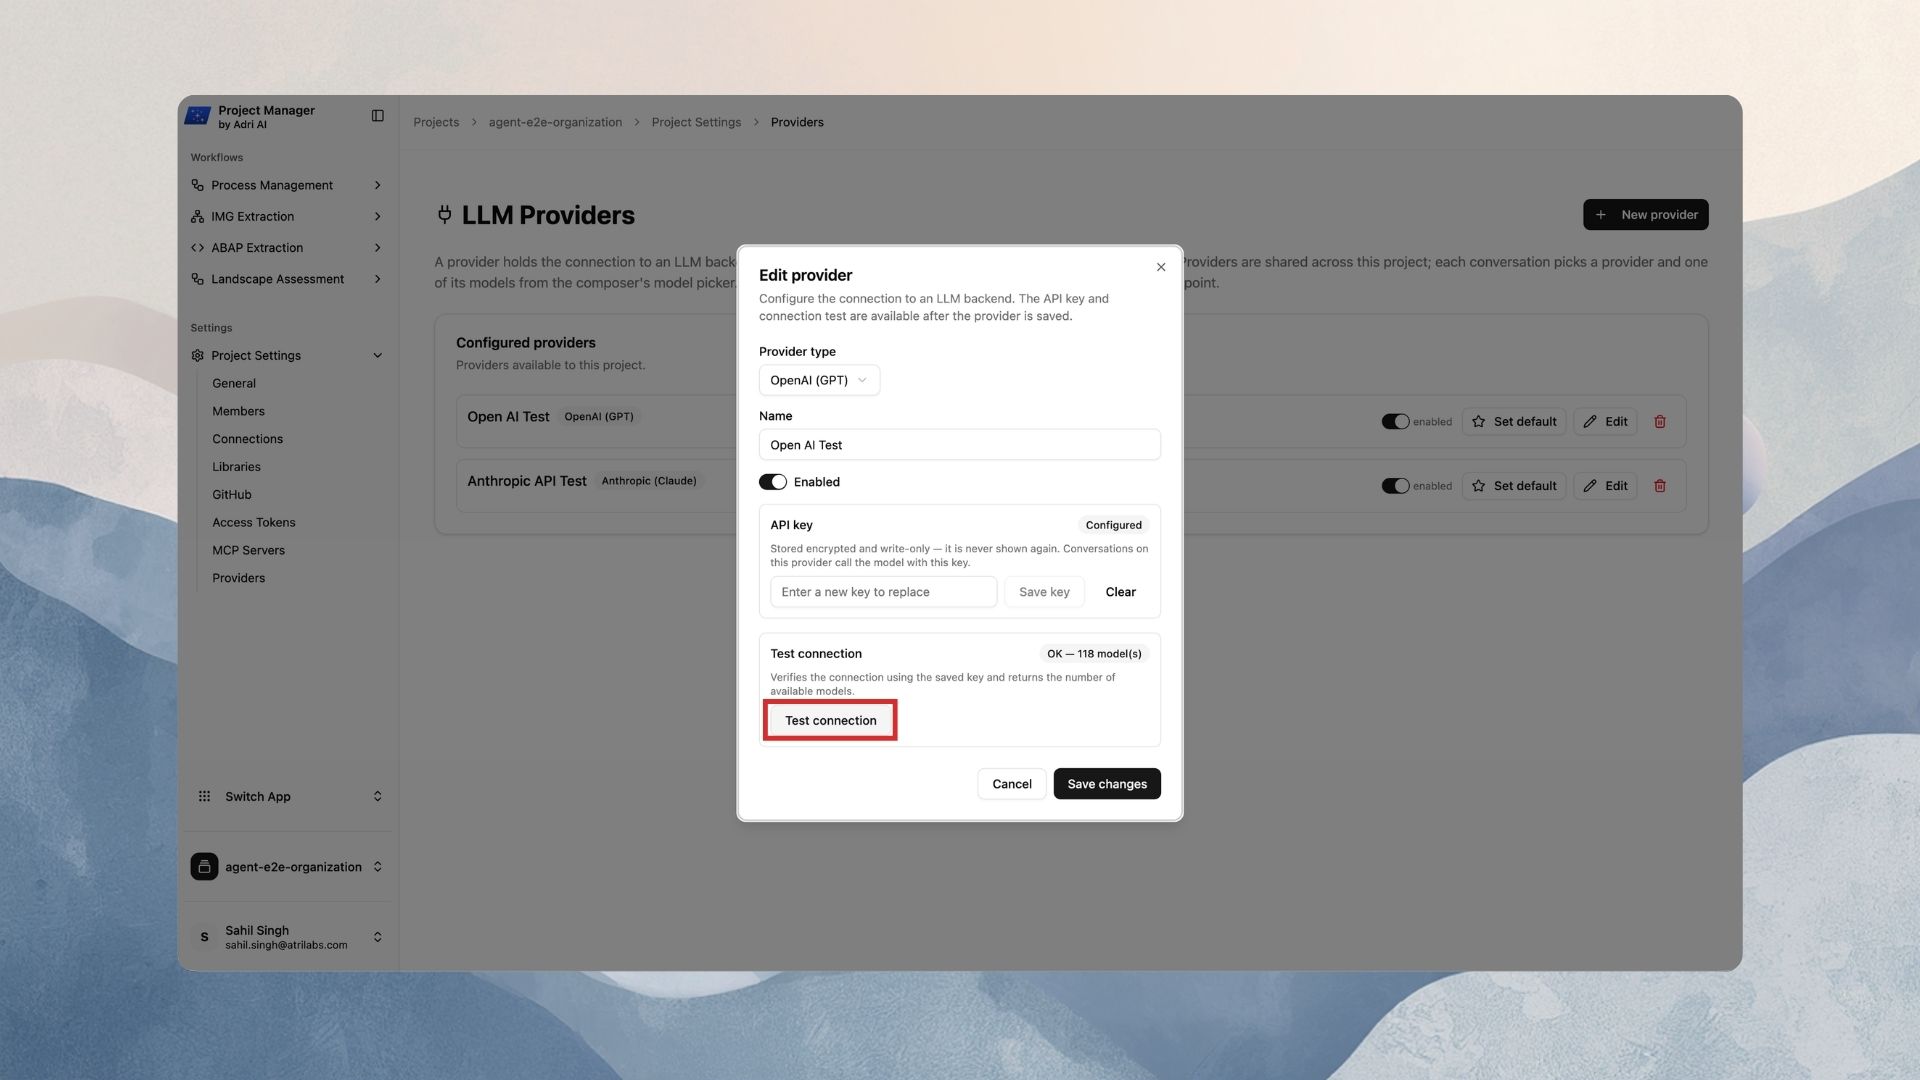
- Wait a moment. You should see the badge turn to OK — N model(s) and a toast like Connection OK — 12 model(s) available.
If it shows Failed, see FAQs & troubleshooting.
- Click Save changes to close the dialog.
5. Verify the provider is ready
Back in the Configured providers list, check your provider's row:
- The type badge shows e.g. Anthropic (Claude).
- The switch shows enabled.
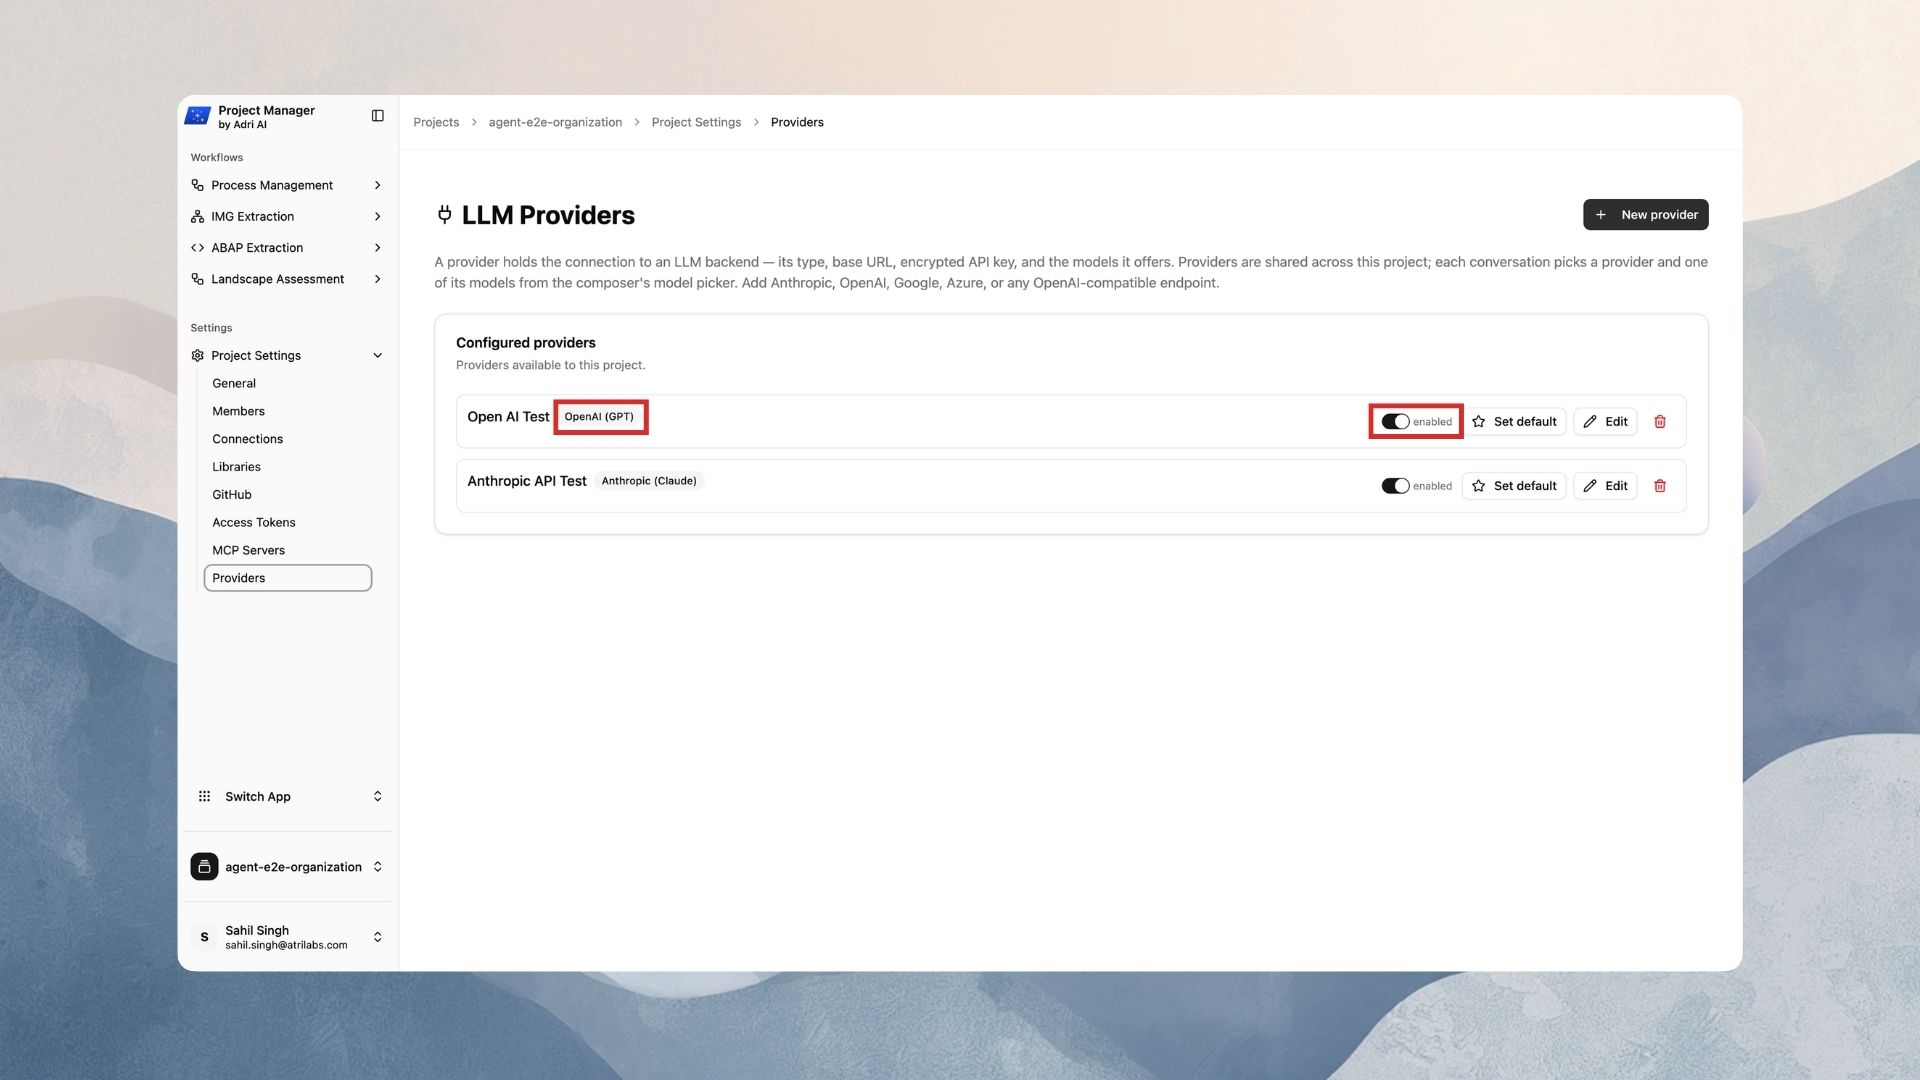
That's it. The provider and its models now appear in the model picker of every conversation in this project.
Next steps
- Switch models in web chat
- Switch models in VS Code
- Manage providers — set one as the project default